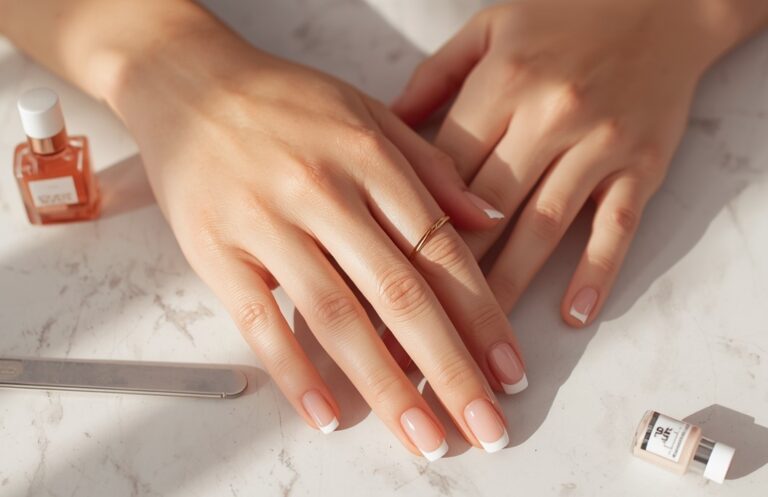
Can You Reuse Press-On Nails? Everything You Need to Know
Press-on nails can be surprisingly expensive, especially high-quality sets with intricate designs or custom work. So it’s natural to wonder: can you reuse them? The short answer is yes, you can absolutely reuse press-on nails—sometimes multiple times. But there’s a right way and a wrong way to do it, and the success of reusing them depends on several factors, including how they were applied, how carefully you remove them, and how well you clean and store them. Let’s break down everything you need to know about getting multiple wears from your press-on nails.
The Truth About Reusability
Most quality press-on nails can be reused at least once, and many can be worn three to five times with proper care. The plastic or acrylic material that press-ons are made from is quite durable and doesn’t degrade simply from being worn. What limits reusability is usually damage during removal, degradation of the adhesive surface, or physical wear like chips and scratches.
The expensive, high-quality press-on nails you might buy from specialty brands or custom nail artists are definitely worth the effort to reuse. These sets can cost anywhere from $20 to $100 or more, so getting multiple wears makes economic sense. Even drugstore press-ons that cost $8 to $15 per set are worth reusing if you like the design or need them again for a specific event.
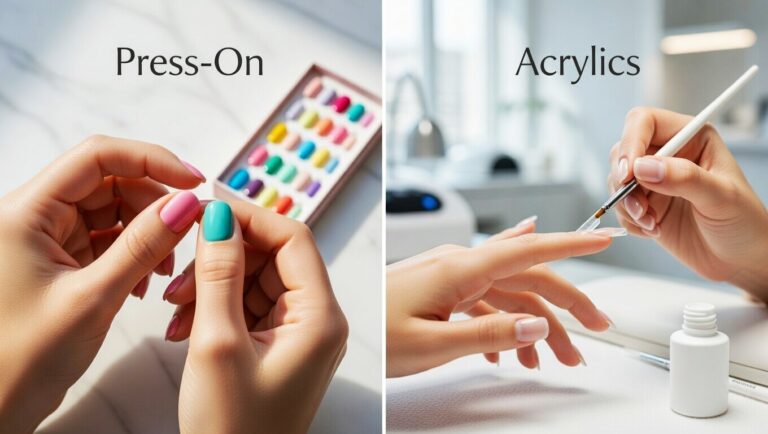
The key factor in reusability is how you applied them initially. Press-ons applied with adhesive tabs are much easier to reuse than those applied with nail glue. Adhesive tabs can be peeled off cleanly, leaving the press-on nail relatively undamaged. Nail glue creates a stronger bond that requires more aggressive removal, which can damage the underside of the press-on.
That said, even glue-applied press-ons can be reused if you’re patient and careful during removal. The difference is that glued nails might only be reusable once or twice, while tab-applied nails can potentially be reused many times.
How Application Method Affects Reusability
If you used adhesive tabs for your initial application, you’re in luck—these are the most reuse-friendly option. The tabs peel away from the press-on nail cleanly in most cases, and any residue can be easily removed. Your press-on nails should look almost like new after removal, ready to be applied again with fresh adhesive tabs.
Adhesive tabs themselves aren’t reusable—once you remove press-ons that were applied with tabs, you’ll need new tabs for reapplication. But tabs are inexpensive and often sold separately in bulk, so this isn’t a major cost. The press-on nails themselves, which are the expensive part, remain in excellent condition for multiple uses.
Nail glue makes reusing more challenging but not impossible. The glue bonds strongly to both your natural nail and the underside of the press-on. When you remove glued press-ons, some glue will inevitably remain stuck to the press-on’s underside. This dried glue creates a bumpy, uneven surface that prevents smooth reapplication.
The good news is that dried nail glue can be removed with patience and the right technique. You’ll need to clean the press-ons thoroughly after removal to restore a smooth surface. This cleaning process is crucial—if you skip it and try to reapply press-ons with old glue still on them, they won’t adhere properly and will look bumpy and unnatural.
The Proper Way to Remove Press-Ons for Reuse
If you know you want to reuse your press-on nails, the removal process is critical. Never, ever peel or pop off press-on nails forcefully. This is the fastest way to damage them beyond reuse. The press-ons can crack, chip at the edges, or develop stress fractures that make them unusable.
For press-ons applied with adhesive tabs, soak your hands in warm soapy water for 10 to 15 minutes. The water softens the adhesive, allowing the press-ons to release gently. Add a few drops of oil to the water if you want—this can help break down the adhesive even faster. Once they feel loose, use a wooden cuticle stick to gently lift the edges of each press-on nail, starting from the sides.
Work slowly and patiently. If a nail doesn’t want to come off, soak for another five minutes rather than forcing it. The goal is for the press-on to slide off with minimal resistance. When removed properly, the press-on should be completely intact with only the adhesive tab still attached to its underside.
For glue-applied press-ons, you’ll need acetone. Fill a bowl with pure acetone and soak your nails for 15 to 20 minutes. For faster results, soak cotton balls in acetone, place them over each nail, and wrap your fingertips in aluminum foil. This concentrated exposure breaks down the glue more effectively.
After soaking, the glue should be soft enough that you can gently wiggle the press-ons off. Use a wooden cuticle stick to help lift them if needed, but don’t force anything. If they don’t come off easily, soak for another five to ten minutes. Patience during removal is what preserves press-ons for reuse.
Cleaning Press-Ons for Reuse
Once your press-on nails are off, immediate cleaning is essential. The longer old adhesive or glue sits on the press-ons, the harder it becomes to remove. Start by examining each nail for any remaining adhesive. Adhesive tab residue usually appears as a sticky or slightly tacky surface on the underside of the press-on.
For adhesive tab residue, use your fingers or a wooden cuticle stick to gently roll and rub off the sticky material. Most of it should come off easily. For any stubborn bits, use a cotton pad dampened with rubbing alcohol or acetone. Wipe the entire underside of each press-on thoroughly until it feels completely smooth and clean.
For dried nail glue, you’ll need to be more aggressive. Soak a cotton ball in acetone and press it against the underside of the press-on nail for 30 to 60 seconds. This softens the dried glue. Then use a wooden cuticle stick or an old toothbrush to gently scrub away the softened glue. Work carefully to avoid scratching the press-on nail itself.
You may need to repeat this process several times to remove all traces of glue. The goal is a completely smooth underside that looks and feels like a new press-on nail. Any bumps or rough spots will prevent proper adhesion when you reapply them.
After removing all adhesive or glue, wash the press-on nails with warm soapy water to remove any remaining acetone or residue. Dry them thoroughly with a clean towel or paper towel. Inspect each nail carefully—you want the underside to be completely smooth and the top surface to be free from chips, cracks, or damage.
Storing Press-On Nails Between Uses
Proper storage is crucial for maintaining press-on nails between wears. Clean, dry press-ons should be stored in a way that protects them from damage and keeps them organized. The original packaging is ideal if you still have it—those plastic or cardboard cases are designed to hold the nails securely.
If you don’t have the original packaging, create your own storage solution. A small plastic container with a lid works perfectly. You can use compartmentalized containers like pill organizers to keep different sizes separated. Some people use contact lens cases for storing press-on nails—each section holds several nails.
Before storing, organize the press-on nails by size and finger. You might want to label them (index, middle, ring, etc.) or simply arrange them in order. This makes reapplication much easier—you won’t have to re-size every nail. You can use small stickers on the storage container or even write on the inside of the lid to note which nail goes where.
Store your press-on nails in a cool, dry place away from direct sunlight. Heat and UV exposure can cause the plastic to become brittle or the color to fade over time. A bathroom drawer or bedroom dresser works well. Avoid storing them loose in a bag or pouch where they can rub against each other and get scratched.
If your press-ons have embellishments like rhinestones or 3D elements, take extra care in storage. Wrap them individually in tissue paper or place them face-up in a container with padding to protect the decorations. These details are delicate and can be knocked off easily if the nails are jostled or stacked.
Reapplying Your Press-On Nails
When you’re ready to wear your press-on nails again, inspect each one carefully before application. Look for any chips, cracks, or damage that occurred during the first wear or removal. Minor chips at the free edge can often be filed smooth, but cracks or breaks usually mean that nail isn’t suitable for reuse.
Check the underside of each press-on again, even if you cleaned them after removal. Sometimes residue becomes more noticeable after the nails have sat for a while. Give them another quick wipe with rubbing alcohol to ensure perfect cleanliness. The surface should be completely smooth—run your finger over it to check.
For reapplication, adhesive tabs are your best choice even if you used glue the first time. Fresh adhesive tabs work beautifully on cleaned press-on nails and make future removal and reuse even easier. If you prefer to use glue again, make sure you apply a thin, even layer—the temptation is to use more glue thinking it will help with adhesion, but this actually makes removal harder and reduces future reusability.
Follow the same prep and application process you used initially. The condition of your natural nails matters just as much the second time around. Proper prep—buffing, cleaning with alcohol, and completely drying your natural nails—is essential for good adhesion whether you’re using new or reused press-ons.
Reused press-ons may not last quite as long as they did the first time, especially if you’re using glue. The underside surface, even when thoroughly cleaned, isn’t quite as pristine as a brand-new nail. But with proper application, you should still get at least a week of wear, often longer.
How Many Times Can You Reuse Them?
The number of times you can reuse press-on nails varies based on several factors. Press-ons applied with adhesive tabs and carefully maintained can often be reused five to ten times or even more. Each wear and removal cycle causes minimal damage to the nail itself, and as long as you clean and store them properly, they remain functional.
Press-ons applied with nail glue typically have fewer reuses in them—usually two to four times. Each removal and cleaning cycle is harder on glue-applied nails, and eventually, the underside becomes too degraded to bond well. The press-ons themselves might still look fine, but they won’t stay on properly.
The overall quality of the press-on nails matters significantly. Thick, sturdy press-ons from quality brands can withstand multiple wears better than thin, flimsy ones from dollar stores. High-end custom nails are often made from thicker acrylic that’s more durable and holds up better to repeated removal and reapplication.
Your lifestyle during wear also affects reusability. If you’re gentle with your press-ons, avoid excessive water exposure, and don’t use your nails as tools, they’ll remain in better condition. Press-ons that are subjected to rough use, frequent hand washing, or heavy-duty activities will show more wear and have fewer reuses available.
Physical damage is usually what ends a press-on nail’s useful life rather than adhesion issues. Eventually, nails will develop chips, cracks, or significant wear that makes them look tired even if they still technically stick on. Most people choose to retire press-ons based on appearance rather than function.
Maintaining Press-Ons to Maximize Reusability
If you want to get maximum reuses from your press-on nails, take extra care during wear. Wear rubber gloves for any task involving water, chemicals, or cleaning. Water is particularly damaging because it seeps under press-ons and weakens adhesive, and frequent water exposure can also cause the press-on material itself to become cloudy or discolored over time.
Avoid using your nails as tools—don’t pry, scrape, scratch, or pick with them. Use your fingertips instead of your nail tips for tasks like opening cans or typing. This prevents chips and cracks that make press-ons unsuitable for reuse. Be careful around hard surfaces that could cause impact damage.
Keep the surface of your press-ons protected. If they have a smooth, shiny finish, avoid harsh scrubbing or abrasive materials that could dull or scratch them. If you’re applying polish or nail art on top of press-ons, use non-acetone remover to remove it—acetone can damage the press-on surface over time.
Remove press-ons before they start lifting on their own. It’s tempting to keep wearing them as long as possible, but once a nail starts to lift, people often fidget with it or it gets caught on things, causing damage. Removing them proactively while they’re still in good condition preserves them for reuse.
Apply cuticle oil around your press-ons during wear, but be careful not to get oil under the nails. Oil around the cuticles keeps your natural nails healthy and actually helps press-ons look better, but oil under the press-ons weakens adhesive and can cause premature lifting.
When Press-Ons Can’t Be Reused
Sometimes press-on nails simply can’t be salvaged for another wear. Obvious damage like cracks, breaks, or large chips means the nail should be retired. Even if the damage doesn’t affect function, it will be visible and make your manicure look sloppy.
Significant warping or bending indicates the press-on has lost its structural integrity. This can happen if press-ons get too hot or are stored improperly. Warped nails won’t sit flat against your natural nail and won’t look natural. Severe discoloration or cloudiness, especially on the underside, also signals the end of a press-on’s useful life.
If the underside of a press-on nail becomes too rough, pitted, or damaged from repeated glue removal, it may not be worth reusing. You’ll spend so much time trying to get it smooth that you might as well buy a new set. There’s a point where the effort isn’t worth it anymore.
Persistent odor that doesn’t go away with cleaning can indicate bacterial growth or deep material degradation. This is rare but can happen if press-ons are stored while still damp or dirty. When this occurs, it’s time to throw them away for hygiene reasons.
Lost or missing embellishments on decorative press-ons might not make them unusable functionally, but they do affect appearance. If a rhinestone falls off or a 3D flower breaks, the nail will look incomplete. You can sometimes repair these issues with nail glue and replacement gems, but often it’s not worth the effort.
Tips for Specific Press-On Types
Different types of press-on nails have different reusability considerations. Short, natural-looking press-ons are generally the most reusable because they undergo less stress during wear and are easier to remove without damage. Long stiletto or coffin nails are more prone to breaking or cracking, especially at the tips, but can still be reused if handled carefully.
Press-ons with intricate designs, nail art, or hand-painting are definitely worth the effort to reuse since they’re often expensive or one-of-a-kind. These should always be applied with adhesive tabs rather than glue to make removal easier and less likely to damage the artwork. Take extra care during cleaning to avoid smudging or scratching the design.
Gel or glossy finish press-ons typically hold up well to multiple uses. The sealed surface is durable and resistant to wear. Matte finish press-ons can show fingerprints and oils more readily, so they may look worn after just one use even if they’re structurally fine. You can often restore a matte finish by very lightly buffing the surface between uses.
Press-ons with 3D embellishments like rhinestones, pearls, or charms require delicate handling. Store these face-up or individually wrapped to protect the decorations. Check before each reuse that all embellishments are still secure—you can reattach loose pieces with a tiny drop of nail glue.
Customized or hand-painted press-ons deserve the most careful treatment. These represent someone’s artwork and are often expensive. Always use adhesive tabs with custom nails, remove them with extreme patience, and store them in protective packaging between uses. Many people get ten or more wears from quality custom press-ons.
The Economics of Reusing
Let’s talk numbers. A decent set of press-on nails costs $10 to $15 at drugstores, while specialty brands run $20 to $40. Custom handmade sets from nail artists can cost $50 to $150 or more. If you can reuse a set even just once, you’ve cut the per-wear cost in half. Reuse it four times, and you’re paying $3 to $10 per wear, which is far cheaper than salon services.
Adhesive tabs for reapplication cost about $3 to $5 for a pack that includes multiple sets. Even factoring in the cost of tabs, reusing press-ons is economical. Compare this to gel manicures at $40 to $60 per visit or acrylic fills at $30 to $50, and the savings of reusable press-ons become obvious.
For people who like to change their nail look frequently, reusing press-ons makes it feasible to own multiple sets. You might have work-appropriate nails, fancy nails for events, and fun designs for weekends—rotating between sets as needed. This variety would be prohibitively expensive with fresh nails every time.
The environmental aspect matters too. Reusing press-on nails reduces waste and consumption. Instead of throwing away plastic nails after one wear, you’re maximizing the use of each set before it eventually needs to be discarded. For eco-conscious consumers, this is an important consideration.
Building a Reusable Press-On Collection
Once you understand how to reuse press-ons successfully, you can start building a collection of go-to sets. Invest in a few high-quality sets in versatile styles—a natural nude set, a classic French tip, maybe a glam set with rhinestones for special occasions. With proper care, these sets can serve you for months or even years.
Create a storage system that keeps your collection organized. A tackle box or craft storage container with compartments works perfectly. Label each compartment with the style name or color so you can find what you want quickly. Keep your supplies—adhesive tabs, nail glue, cleaning materials—organized in the same system.
Take photos of each set when new and store the photos with notes about sizing for each finger. This makes reapplication much faster—you won’t have to re-test every size. Some people even create a little catalog of their press-on collection with photos and notes about when each set is appropriate to wear.
Rotate your sets to extend the life of each one. If you have three or four sets you love, wear each one twice a month rather than one set constantly. This gives each set more time to “rest” between uses and spreads out the wear, extending overall lifespan.
The Bottom Line
You absolutely can reuse press-on nails, and with proper technique, you can get multiple wears that make them a cost-effective and sustainable option for beautiful nails. The keys are gentle removal to avoid damage, thorough cleaning to prepare them for reuse, and proper storage to keep them in good condition between wears.
Press-ons applied with adhesive tabs are easier to reuse than glue-applied nails, but both methods work with the right approach. High-quality press-ons are worth the investment because they can be reused many times, while cheaper sets might only be reusable once or twice.
The effort involved in reusing press-ons is minimal—a few minutes to clean and store them properly—and the payoff is significant both financially and environmentally. Whether you’re reusing expensive custom nails to get more value from your investment or reusing everyday press-ons to reduce waste, the practice makes sense.
Treat your press-on nails with care during wear, remove them patiently and properly, clean and store them correctly, and you’ll find that they serve you well through multiple applications. Your press-on nail collection can become a rotating wardrobe of manicure options, ready whenever you want to change up your nail look without breaking the bank or making another trip to the salon.
How many times have you successfully reused your press-on nails? Share your tips and tricks in the comments below!