How to Apply Nail Polish Perfectly Every Time
There’s something incredibly satisfying about a flawless manicure—smooth, even color, clean cuticle lines, and no streaks or bubbles. Yet achieving that salon-quality finish at home can feel impossible when your polish looks streaky, floods your cuticles, or chips within a day. The truth is that perfect polish application isn’t about luck or natural talent—it’s about technique, the right tools, and knowing the tricks that professionals use. Whether you’re a complete beginner or someone who’s been struggling with polish application, mastering these methods will transform your manicures from frustrating attempts to consistently beautiful results. Let’s break down every step of the process so you can achieve perfect polish application every single time.
Start with Proper Nail Preparation
Perfect polish starts before you ever open a bottle. Proper preparation creates the ideal surface for polish adhesion and longevity. Many people skip these crucial first steps, which is why their manicures fail.
Remove all old polish completely. Use a quality acetone-free remover for regular polish, working until every trace of color and residue is gone. Pay special attention to the cuticle area and sides where old polish often hides. Any remaining polish prevents new polish from adhering properly.
Wash your hands thoroughly with soap and water to remove oils, lotions, and dirt. These substances create a barrier between your nail and the polish, causing premature chipping. Scrub nails gently with a soft brush if you have one. Dry your hands completely—water on or under nails is polish’s enemy.
Shape your nails to your preferred length and style. Use a glass file and file in one direction only, never back and forth. Shape nails when they’re completely dry, as wet nails are vulnerable to damage. File edges smooth so there are no rough spots where polish can catch.
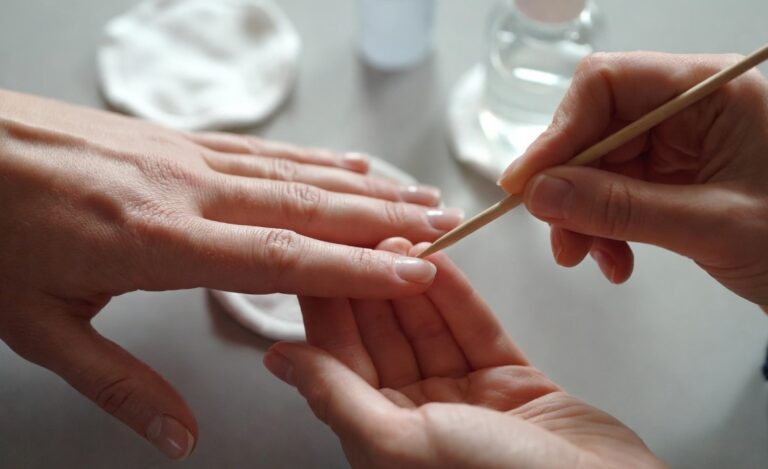
Push back cuticles gently. Soak nails in warm water for 5 minutes to soften cuticles, then use a cuticle pusher to gently push them back. This creates a clean canvas and allows polish to reach closer to the cuticle line for a more professional appearance. Don’t cut cuticles unless absolutely necessary—pushing is sufficient and safer.
Buff nails lightly if they have ridges or rough texture. Use a fine-grit buffer and gentle pressure, buffing just enough to smooth the surface. Don’t over-buff, which thins nails. This step creates an even surface that helps polish go on smoothly.
Clean nails with alcohol or polish remover as a final prep step. Wipe each nail with a cotton pad dampened with rubbing alcohol or acetone-free remover. This removes any remaining oils or residue and slightly dehydrates the nail surface, creating the ideal texture for polish adhesion. Let nails air dry for a minute before applying polish.
This prep work might seem tedious, but it makes the difference between polish that lasts days versus hours. Never skip these steps if you want professional results.
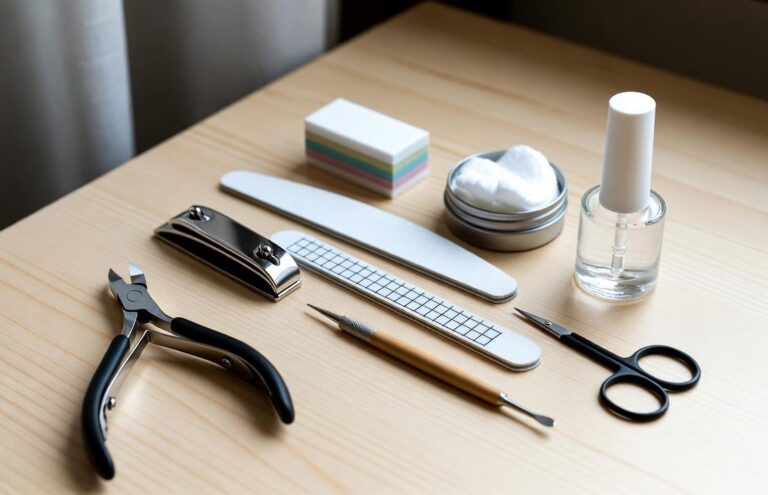
The Right Tools Make All the Difference
Having the right tools transforms polish application from struggle to success. You don’t need dozens of items, but these essentials make perfect application achievable.
Quality base coat is non-negotiable. It creates a smooth surface, prevents staining, and helps color polish adhere. Ridge-filling base coats are excellent if you have any nail texture. Strengthening base coats add protection for weak nails. Apply base coat to every manicure, every time.
Good color polish matters more than you might think. Old, thick, or separated polish applies unevenly no matter how skilled you are. Fresh polish with the right consistency flows smoothly and self-levels. Cheap polish sometimes works fine, but quality brands generally have better brushes and formulas.
Quick-dry top coat protects your manicure and speeds drying dramatically. Seche Vite is the professional standard, but many brands make excellent quick-dry formulas. This is worth investing in for the time savings and chip resistance.
Cleanup tools are essential for perfection. A small angled brush for precision cleanup, cotton swabs for quick fixes, and a good acetone-free remover for corrections make removing mistakes easy.
Nail polish thinner revives polish that’s become too thick. Don’t use nail polish remover to thin polish—it breaks down the formula. Proper polish thinner restores the right consistency, extending polish life.
The Perfect Base Coat Application
Base coat application sets the foundation for everything that follows. Apply base coat to clean, dry nails immediately after your final alcohol wipe. Start with a thin coat—thick base coat takes forever to dry and can cause bubbling.
Use three-stroke application: place the brush in the center of your nail slightly back from the cuticle, push the brush gently toward the cuticle without touching it, then stroke straight up the center of the nail. Go back and do the left side in one smooth stroke from cuticle to tip, then the right side.
Cap the free edge by running the brush along the tip of your nail. This seals the edge and significantly improves polish longevity. Many people skip this step and wonder why their tips chip so quickly.
Let base coat dry completely before applying color. This takes 1 to 2 minutes. Touch test—if the base coat feels tacky or moves when you gently touch it, wait longer. Applying color over wet base coat causes dragging, streaking, and extended drying time.
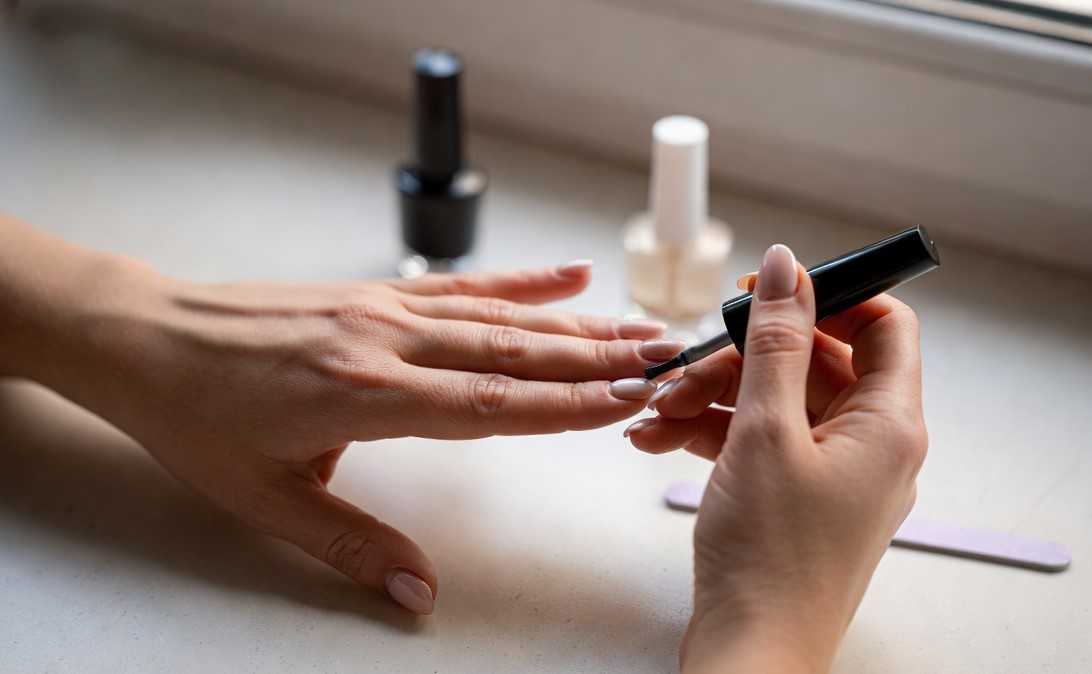
Mastering the Three-Stroke Color Application Technique
The three-stroke method is the professional standard for a reason—it provides even coverage with minimal strokes, reducing the chance of streaks or bubbles.
First, prepare your brush. Wipe one side of the brush against the bottle neck to remove excess polish. You want the brush well-loaded but not dripping. Too much polish causes flooding and thick, uneven application. Too little requires multiple coats and still looks streaky.
Start in the center of your nail. Place the brush on the nail surface about 1/16 inch from your cuticle (roughly the width of a credit card). Don’t touch the cuticle yet. Press down slightly to splay the brush bristles, which pushes polish toward the cuticle without flooding it.
The first stroke goes up the center. In one smooth, even motion, stroke the brush straight up the center of your nail from near the cuticle to the tip. Apply even pressure throughout the stroke. This center stripe is your guide for the side strokes.
Second stroke covers the left side. Reload the brush if needed—better to reload than try to spread too little polish. Place the brush at the left base and stroke smoothly up the left side of the nail from cuticle to tip in one motion.
Third stroke covers the right side. Reload if necessary and stroke up the right side from cuticle to tip. These three strokes should cover your entire nail evenly without requiring additional strokes or touch-ups.
Cap the tip by running the brush along the free edge, just like with base coat. This step is crucial for preventing chips.
The key is smooth, confident strokes. Hesitation causes uneven polish. If you mess up, don’t try to fix it immediately—let it dry, then clean up and start over. Messing with wet polish makes it worse.
Thin Coats vs. Thick Coats: The Golden Rule
The single most important rule in polish application is thin coats over thick coats, always. Thick coats seem appealing—better coverage in fewer layers—but they cause multiple problems.
Thick polish takes forever to dry, remaining vulnerable to smudges and dents for hours. It’s more prone to bubbling, which happens when the surface dries while the underneath remains wet. Thick coats shrink as they dry, pulling away from edges and causing premature chipping. They create a gloopy, uneven texture that looks amateur.
Thin coats dry quickly—a properly thin coat is dry to the touch in 60 to 90 seconds. Multiple thin coats build up to opaque, even coverage without the problems thick coats create. They create a smooth, professional finish that looks like one seamless layer.
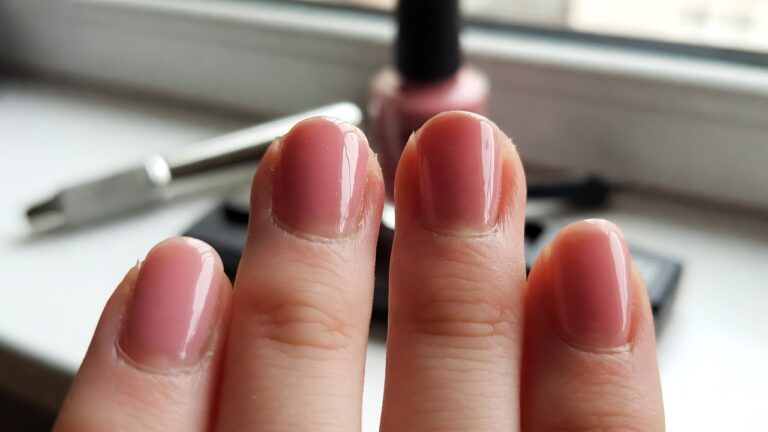
How thin is thin enough? You should see your nail slightly through the first coat of colored polish. This feels wrong—it looks streaky and uneven. Trust the process. The second coat evens everything out. If your first coat is opaque, it’s too thick.
Most polishes need two thin coats for opacity. Some sheer colors need three. Glitters and special finishes might need different approaches, but for standard crème polish, two thin coats is the goal.
Wait 2 minutes between coats for thin polish, 3-5 minutes for thicker formulas or in humid conditions. The previous coat should be dry to the touch before adding another layer.
Perfecting Your Cuticle Line
The cuticle line is where most people struggle. Flooding cuticles or leaving gaps between polish and cuticle both look unprofessional. Here’s how to get it perfect.
The push-and-pull method gives the cleanest cuticle lines. Place your loaded brush in the center of your nail, slightly away from the cuticle. Gently push the brush toward the cuticle, stopping just before you touch it. The polish will spread slightly toward the cuticle as the brush splays. Then pull the brush straight up the nail. This gets polish very close to the cuticle without touching it.
Leave a hairline gap between polish and cuticle. Trying to touch the cuticle guarantees flooding. A tiny gap is invisible from normal viewing distance and prevents the messy cuticle flooding that looks terrible.
If you do flood the cuticle, don’t panic or try to fix it while wet. Let it dry completely, then use a cleanup brush dipped in remover to clean the excess. A small angled brush gives the most precise cleanup.
Practice on your non-dominant hand first. Everyone finds one hand harder than the other. Starting with the difficult hand means if you get frustrated, you’re not messing up the hand you’ve already perfected.
The Secret to Cleanup: Tools and Technique
Even professionals get polish on their skin sometimes—the difference is they know how to clean it up perfectly. The right tools and technique make cleanup easy.
A small angled brush is the professional’s secret weapon. These precision brushes, available from nail supply stores or art supply stores, allow surgical precision in cleanup. Dip the brush in acetone-free remover, wipe off excess on a tissue so it’s damp but not dripping, then carefully trace around your nail to remove any polish on skin.
Cotton swabs work for rougher cleanup. Dip a swab in remover and clean around nails, but swabs aren’t precise enough for perfect cuticle lines. Use them for general cleanup, then switch to the angled brush for detail work.
Cleanup while polish is fully dry, not while tacky. Trying to clean up wet or tacky polish smears it and makes a bigger mess. Wait until polish is completely dry, then clean up. The polish on skin will peel away cleanly without affecting your manicure.
Peel method for skin polish: If you get polish on the skin around your nails, let everything dry completely, then peel the polish off your skin. It comes away in one piece, leaving perfect edges on your nails. This works better than trying to wipe it off.
The Top Coat Application
Top coat is your manicure’s armor and finishing touch. Apply it correctly for maximum shine and protection.
Apply top coat when your final color coat is dry to the touch but not necessarily fully cured. This is usually about 2 minutes after application. The slight tackiness helps the top coat adhere beautifully while preventing dragging.
Use the same three-stroke method as with color polish. Apply a slightly thicker layer than you used for color—top coat should create a smooth, glassy finish. Make sure to cover the entire nail, including the sides and especially the tip.
Cap the free edge generously with top coat. Wrap the tip by running the brush under the nail edge, then along the tip. This seals everything and is the most important step for preventing chips.
Don’t skimp on top coat. This is the layer protecting everything underneath. A good layer of top coat adds days to your manicure’s life. Quick-dry formulas are worth seeking out—they genuinely cut drying time by half or more.
Reapply top coat every 2 to 3 days to refresh shine and add protection. This maintenance step extends your manicure significantly.
Drying: The Patient Person’s Game
Even with quick-dry top coat, patience during drying prevents the heartbreak of smudged nails. Polish dries in layers—the surface dries first while underneath remains wet. This is why nails that seem dry suddenly dent when you touch them.
Wait at least 5 to 10 minutes before doing anything with your hands. This allows the top coat to harden adequately. Quick-dry drops or spray can speed this further, but nothing replaces time.
The water test tells you when nails are safe. After 10 minutes, gently run cold water over your nails. If the polish feels hard and slick, you’re safe to be careful with your hands. If it feels soft or sticky, wait longer.
Full cure takes hours, not minutes. Polish may feel dry after 10 to 15 minutes, but it’s not fully hardened. Avoid activities that stress your nails for at least 2 hours. Don’t shower or wash dishes for 3 to 4 hours if possible. The longer you can baby your fresh manicure, the longer it lasts.
Cold water speeds drying. After polish feels dry to the touch, submerge nails in ice water for 2 to 3 minutes. This hardens the polish faster. Some people swear by this method.
Common Mistakes and How to Avoid Them
Understanding common mistakes helps you avoid them. Here are the errors that ruin most manicures.
Shaking polish bottles creates bubbles that transfer to your nails. Roll the bottle between your palms instead to mix settled pigment. This mixes without incorporating air.
Painting over uncured layers causes dragging, streaking, and extended drying time. Wait between coats. Impatience creates more work, not less.
Going back over wet polish to fix imperfections makes them worse. If something goes wrong mid-stroke, let it dry, remove it, and start fresh. Don’t try to fix wet polish.
Using old, thick polish guarantees poor results. Thick polish doesn’t self-level, creating streaks and an uneven surface. Refresh old polish with polish thinner or replace it.
Skipping base coat leads to staining and poor adhesion. Skipping top coat eliminates chip protection and shine. Both are essential, not optional.
Flooding cuticles happens when you start too close to the cuticle or use too much polish. Leave a small gap and use less polish on the brush.
Not capping tips is the most common reason for premature chipping. Always run polish along the free edge with base coat, color, and top coat.
Advanced Tips for Perfect Application
Once you’ve mastered the basics, these advanced techniques take your manicures to the next level.
Thin your polish if it’s become thick or goopy. Add a drop or two of polish thinner (not remover), roll to mix, and test consistency. Proper consistency flows smoothly without being watery.
Use a fan brush for glitter toppers or difficult polishes. The wider, flatter brush distributes chunky elements more evenly.
Apply lotion or cuticle oil around nails (not on them) before polishing. This creates a barrier so polish that gets on skin peels off more easily. Wipe nails clean with alcohol before applying polish.
Paint your dominant hand first while fresh and focused. By the time you reach your non-dominant hand, you’re warmed up and have found your rhythm.
Cool your polish in the refrigerator for 15 minutes before use in hot weather. Cool polish applies more smoothly and is less prone to bubbling.
Use tape or liquid latex barriers around nails when using difficult-to-control polishes like magnetic or multichrome formulas. Cleanup becomes much easier.
Troubleshooting Common Issues
Streaky polish: Usually caused by too-thick application or not waiting between coats. Use thinner coats and wait longer between layers. Some polish formulas are naturally streaky—add an extra thin coat rather than making coats thicker.
Bubbles: Caused by shaking bottles, thick application, or applying polish in humid conditions. Roll bottles to mix, use thin coats, and run polish under cold water before using in humid weather.
Chips within a day: Usually means inadequate prep (nails not clean), skipping base or top coat, or not capping tips. Improve your prep routine and always cap edges.
Smudges and dents: Polish wasn’t fully dry when touched. Wait longer before using your hands. Quick-dry products help but don’t replace patience.
Polish won’t dry: Layers are too thick, or you didn’t wait between coats. Next time use thinner layers and proper dry time between coats.
Peeling in sheets: Polish wasn’t applied to clean, dry nails, or you used lotion/oil on nails before polishing. Ensure nails are completely clean and dry before base coat.
Making Your Manicure Last
Perfect application is just the start—proper aftercare keeps your manicure looking fresh for days or weeks.
Wear gloves for any wet work. Water is polish’s biggest enemy. Dishes, cleaning, and extended hand washing in the first 24 hours are particularly damaging.
Apply cuticle oil daily once your manicure is fully cured. This keeps nails and cuticles healthy without affecting polish. Apply oil to cuticles and surrounding skin, massaging gently.
Reapply top coat every 2 to 3 days. Fresh top coat refreshes shine and adds protection. This maintenance step can double your manicure’s lifespan.
Avoid hot water for the first few hours after application. Hot water softens polish and can cause bubbling or denting.
Be gentle with nails. Don’t use them as tools, pick at the polish, or subject them to activities that create chips. Conscious care extends wear significantly.
The Bottom Line
Perfect polish application comes down to proper preparation, thin coats applied with good technique, adequate drying time between steps, and patience during the curing process. Master these fundamentals and you’ll achieve consistently beautiful results.
The difference between amateur and professional-looking nails isn’t talent or expensive products—it’s understanding the process and following it properly. Start with clean, dry, prepped nails. Apply thin, even coats with confident strokes. Wait between layers. Cap your tips. Let everything dry completely.
Practice makes perfect. Your first attempt might not be flawless, but each manicure improves your technique. By your tenth try, you’ll be achieving results that rival salon work. The tools and products matter, but technique matters more.
Invest in quality base coat, top coat, and cleanup tools. These make the biggest difference in results and are worth seeking out. Practice the three-stroke method until it becomes natural. Be patient during drying. Your beautiful, long-lasting manicures will prove that perfect polish application isn’t luck—it’s skill you can absolutely master.
What’s your biggest challenge with polish application? What techniques have helped you achieve better results? Share your tips and questions in the comments!