How to Make Press-On Nails Last Longer: Expert Tips
Press-on nails have come a long way from the temporary, obviously fake options of the past. Today’s press-ons can look salon-quality and, with the right application and care techniques, last up to two weeks or even longer. Whether you’re wearing press-ons to save money, protect your natural nails, or simply love the convenience of instant manicures, learning how to maximize their lifespan means you’ll get more value from every set.
Understanding Press-On Nail Longevity
Before diving into techniques, it’s helpful to understand what makes press-on nails pop off prematurely. The adhesive bond between the press-on and your natural nail is affected by several factors including oil, moisture, pressure, and the quality of initial application. When you understand these factors, you can take specific steps to counteract them and extend wear time dramatically.
Most people find that press-on nails last anywhere from three days to a week with basic application. However, with proper preparation and care, you can easily double or triple that timeframe. The key is creating the optimal conditions for adhesive bonding and then maintaining that bond through your daily activities.
Nail Preparation: The Foundation of Long-Lasting Wear
The single most important factor in how long your press-ons last is nail preparation. This step is where most people rush or cut corners, not realizing that those extra few minutes of prep work could mean the difference between nails that last three days versus two weeks.
Start by removing any existing nail polish completely using an acetone-based remover. Even if your nails look bare, there might be invisible residue that interferes with adhesion. Acetone not only removes polish but also dehydrates the nail surface slightly, which actually helps adhesive stick better. Don’t use acetone-free removers for this step—the acetone is your friend here.
Next, push back your cuticles gently using a wooden cuticle pusher or an orange stick. You want to expose as much nail plate as possible for the press-on to adhere to. Don’t cut your cuticles unless absolutely necessary, but make sure they’re not covering any of the nail surface. Even a thin layer of cuticle over your nail will prevent good adhesion in that area.
Trim your natural nails as short as possible. This might seem counterintuitive if you’re used to having length, but shorter natural nails provide better adhesion and less leverage for press-ons to pop off. File your natural nails straight across so they’re even and smooth. Any rough edges or uneven surfaces can create air pockets under the press-on.
The buffing step is crucial and often skipped. Use a fine-grit buffer or a nail file to gently roughen the surface of your natural nails. You’re not trying to thin them out—just create a slightly textured surface that gives the adhesive more to grip onto. Buff in gentle circular motions for about 10 seconds per nail. You should see your nails lose their natural shine and take on a slightly matte appearance.
After buffing, wash your hands thoroughly with soap and warm water. This removes all the dust and debris from filing and buffing. Dry your hands completely with a clean towel, paying special attention to your nails. Any moisture left on the nail plate will prevent proper adhesive bonding.
The final and perhaps most critical prep step is dehydrating your nails. Apply rubbing alcohol or nail dehydrator to each nail using a cotton pad or lint-free wipe. This removes any oils, moisture, or residue that might interfere with adhesion. Let your nails air dry completely—they should look completely matte and feel very dry to the touch. Some people apply a second layer of alcohol and let it dry again for extra insurance.
Choosing the Right Adhesive Method
Press-on nails typically come with either adhesive tabs or nail glue, and your choice significantly impacts longevity. Adhesive tabs are convenient and allow for easy removal, but they typically only last three to five days. They’re perfect if you want a weekend manicure or are trying out a new style, but they’re not ideal for maximum wear time.
Nail glue provides much stronger, longer-lasting adhesion—usually one to three weeks depending on your care routine. The key is using the right amount of glue and applying it correctly. For best results, apply a thin layer of glue to both your natural nail and the inside of the press-on. This creates a stronger bond than applying glue to just one surface.
Use a small drop of glue in the center of your nail and spread it thin toward the edges using the glue applicator. You want complete coverage but a very thin layer—thick glue doesn’t dry properly and creates a weaker bond. Apply glue to the press-on as well, again using a thin, even layer. Wait about 30 seconds for the glue to become slightly tacky before pressing the nail on. This brief waiting period actually creates a stronger bond than applying immediately.
Some people use a hybrid approach for maximum longevity. They apply a thin layer of nail glue to their natural nail, wait for it to dry until tacky, then use the adhesive tab that comes with the press-ons. The dried glue layer creates texture that helps the tab stick better, extending its wear time.
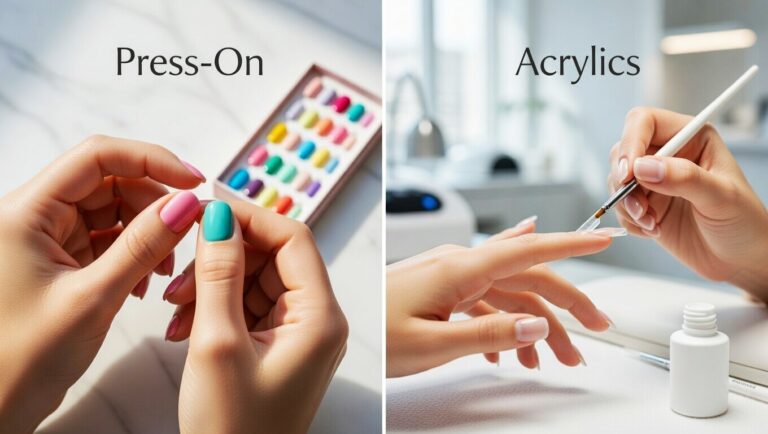
For those who want the absolute longest wear time, consider using brush-on nail glue designed for acrylic application rather than the squeeze bottles that come with most press-on sets. Professional-grade glue provides stronger adhesion, though it also makes removal more challenging.
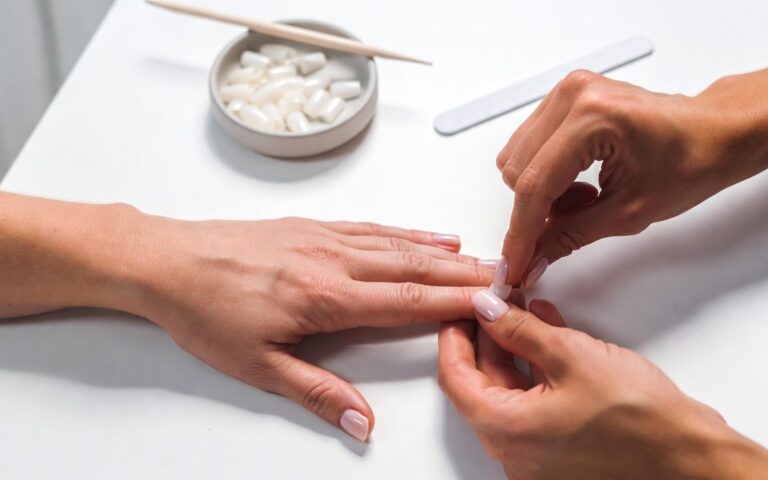
Proper Application Technique
How you apply the press-on is just as important as your prep work. Start by finding the right size press-on for each nail. It should fit your nail bed completely without touching your cuticles or side skin. If it’s too large, it will catch on things and pop off prematurely. If it’s too small, you won’t get good coverage and the exposed edges will catch.
When in doubt, size down rather than up. You can always file a smaller press-on to fit perfectly, but you can’t make a too-large press-on smaller around the cuticle area. Test fit all your press-ons before applying any glue so you know which size goes on which finger.
Apply the press-on at a 45-degree angle, starting at the cuticle area and slowly lowering it down toward your fingertip. This pushes out any air bubbles that might form under the nail. Press down firmly, starting at the cuticle and moving toward the tip. Hold firm pressure for at least 30 seconds per nail—longer if possible. This initial pressure is critical for creating a strong bond.
After pressing each nail, use your thumb to apply pressure all around the edges where the press-on meets your natural nail. This seals the perimeter and prevents water from getting underneath later. Pay special attention to the cuticle area and the sides, as these are where press-ons typically start to lift.
Apply all ten nails before doing any other activities. Don’t wash your hands, apply lotion, or do anything that might stress the newly applied nails for at least one hour—two hours is even better. During this curing time, the adhesive fully sets and creates the strongest possible bond. Some people apply press-ons before bed and let them cure overnight, which produces excellent results.
Sealing for Extra Protection
Once your press-ons are applied and have cured for at least an hour, add an extra layer of protection with a clear top coat. Apply a thick layer of clear nail polish or a gel top coat over the entire press-on and seal the free edge. Make sure to paint slightly over the edge where the press-on meets your natural nail—this creates a seal that prevents water from getting underneath.
Let the top coat dry completely before doing anything with your hands. This sealing step adds several days to your wear time by creating a waterproof barrier. Reapply top coat every three to four days to maintain the seal, especially around the edges where lifting typically starts.
Some people also apply a tiny amount of nail glue around the perimeter of each press-on after application, essentially creating a glue seal. If you try this, use just a drop and spread it very thinly with a toothpick or orange stick. Wipe away any excess immediately before it dries.
The First 24 Hours: Critical Care Period
The first day after application is make-or-break for press-on longevity. During this time, the adhesive is still fully curing and is vulnerable to stress. Avoid getting your nails wet as much as possible during the first 24 hours. This means no hand washing beyond absolute necessity, no dishes, no swimming, and no extended water exposure.
Avoid using your nails as tools during this period. Don’t open cans, peel stickers, or type aggressively. The constant stress during the curing period can weaken the bond before it’s fully set. Be mindful of how you use your hands and try to use the pads of your fingers rather than your nails for tasks.
Keep your hands dry and avoid applying hand lotion or cuticle oil during the first day. These products can seep under the press-on and weaken the adhesive bond while it’s setting. After 24 hours, you can resume normal moisturizing, but during this critical window, keep everything dry.
Some people wear cotton gloves during the first night to protect newly applied press-ons while they sleep. This prevents you from unconsciously picking at them or catching them on bedding. It might seem excessive, but if you’re trying to maximize wear time, these precautions pay off.
Daily Care for Extended Wear
Once your press-ons have fully cured, proper daily care keeps them looking fresh and firmly attached. When washing your hands, use lukewarm water rather than hot water. Hot water softens the adhesive and can cause premature lifting. Keep hand washing brief and pat your hands dry rather than rubbing vigorously, which can catch on the press-ons.
Wear gloves for any activity involving water or chemicals. This includes washing dishes, cleaning, gardening, and swimming. Prolonged water exposure is the number one cause of press-ons popping off. Disposable gloves work fine for quick tasks, but invest in quality rubber gloves with cotton lining for longer activities like doing dishes.
Apply hand lotion and cuticle oil regularly, but keep these products away from the edges of your press-ons where they meet your natural nail. Moisturizing keeps your natural nails and cuticles healthy, which indirectly helps your press-ons stay on better. However, getting oil under the press-on will loosen the adhesive.
Be mindful of how you use your hands throughout the day. Use knuckles to push buttons, open doors with your palm rather than pulling with your fingertips, and type with the pads of your fingers rather than your nails. These small adjustments prevent constant stress on the adhesive bond.
Avoid excessive heat when possible. Things like opening hot car doors, handling hot dishes, or using heating tools without gloves can soften the adhesive. If you must handle hot items, use a towel or gloves as a barrier.
Maintenance Repairs
Even with perfect care, you might notice slight lifting starting at the edges of a press-on after a week or so. Address this immediately before the entire nail pops off. Use a toothpick to apply a tiny drop of nail glue under the lifted edge, then press firmly for 30 seconds. Wipe away any excess glue that squeezes out.
After making a repair, apply clear top coat over that nail, making sure to seal the repaired edge. These quick fixes can extend your wear time significantly. Catching and fixing small lifting immediately prevents it from spreading and causing the entire press-on to fail.
If a press-on does pop off completely, you can usually reapply it if you act quickly. Clean both your natural nail and the inside of the press-on with rubbing alcohol to remove old adhesive residue. Let everything dry, then reapply using fresh glue following all the application steps. A reapplied press-on won’t last as long as the initial application, but you can usually get several more days from it.
Keep your press-on kit and a small bottle of nail glue with you for emergency repairs. Being able to fix a lifting nail immediately can save your entire manicure.
Activities to Avoid or Modify
Certain activities are particularly hard on press-on nails and should be avoided or modified during your wear time. Swimming, especially in chlorinated pools or salt water, significantly reduces press-on longevity. If you must swim, apply waterproof gloves or plan to reapply your press-ons afterward.
Excessive typing can cause press-ons to pop off, particularly if you’re used to using your nails to type. Adjust your typing style to use your finger pads, and consider taking breaks to give your nails a rest from the repetitive pressure. Working with clay, dough, or other moldable materials can work underneath press-ons and loosen them. Wear gloves for these activities.
Contact sports or activities involving gripping equipment (like weightlifting, rock climbing, or playing guitar) create enormous stress on press-on adhesion. If these activities are part of your regular routine, you might need to time your press-on application carefully or choose shorter press-on lengths that are less likely to catch.
Nail picking or playing with your press-ons will absolutely reduce their longevity. It’s tempting to press on them or wiggle them to check if they’re still secure, but this actually loosens the adhesive. Leave them alone as much as possible.
Choosing Press-Ons for Longevity
Not all press-on nails are created equal when it comes to staying power. Higher-quality press-ons with better materials and designs tend to last longer. Look for press-ons made from ABS plastic rather than cheaper materials—they’re more flexible and less likely to snap off, and they provide better adhesion surface area.
Press-ons with a slight curve that matches your natural nail shape create more contact surface area and better adhesion than completely flat press-ons. The design should allow the press-on to hug your natural nail rather than sitting on top of it. Full-coverage press-ons that extend close to your cuticles and side walls last longer than partial coverage designs.
Consider the length and shape you choose. Shorter press-ons with practical shapes like squoval or round last significantly longer than very long stiletto or coffin shapes. The longer and more dramatic the nail, the more leverage everyday activities have to pull them off. Save extreme lengths and shapes for special occasions, and choose more practical designs for everyday wear.
Some brands are known for better adhesion and quality. While it might cost a bit more upfront, investing in quality press-ons often means you can wear them longer and get more value from each set. Read reviews specifically looking for comments about wear time and adhesion quality.
The Role of Natural Nail Health
The health of your natural nails significantly impacts how long press-ons stay attached. Weak, peeling, or oily nails don’t provide a good surface for adhesion. If you regularly wear press-ons, take breaks between applications to let your natural nails recover and strengthen.
During breaks, focus on nail health by moisturizing with cuticle oil, taking biotin supplements, and avoiding harsh chemicals. Stronger, healthier natural nails provide better adhesion surface for your next press-on application. Consider using a nail strengthener during break periods to build up your natural nails.
Keep your natural nails relatively short even when you’re not wearing press-ons. This prevents them from growing too long between applications, which can create air pockets under press-ons and reduce adhesion. Very oily nails can be problematic for press-on adhesion. If this is you, be extra diligent with the dehydrating step during prep. Some people with naturally oily nails wipe them with rubbing alcohol several times before application.
Removal Done Right for Future Success
How you remove press-ons affects not only your natural nail health but also how well future press-ons will adhere. Never force press-ons off by pulling or prying—this damages your natural nails and creates rough, uneven surfaces that won’t hold future press-ons well.
The proper removal method depends on how they were applied. For adhesive tab applications, gently work a wooden cuticle stick under the edge and slowly lift. For glue applications, soak your nails in warm soapy water for 10 to 15 minutes to soften the adhesive, then gently work a cuticle stick under the edges. You can also use acetone to dissolve nail glue—soak cotton balls in acetone, place them on each nail, wrap with aluminum foil, and wait 10 to 15 minutes.
After removal, clean your natural nails thoroughly with rubbing alcohol to remove all adhesive residue. Moisturize immediately with cuticle oil and hand cream. Give your nails at least a day or two of rest before applying another set—longer if possible. This recovery time keeps your natural nails healthy and ready for good adhesion.
Advanced Tips from Professionals
Nail technicians who work with press-ons regularly have discovered additional tricks for maximum longevity. Some professionals recommend applying a thin layer of base coat to your natural nails after the alcohol prep step, letting it dry completely, then buffing lightly before applying glue. This creates texture that enhances adhesion.
Using a nail dehydrator or pH-balancing primer (products used in professional acrylic application) before applying glue can extend wear time significantly. These products are available online and at beauty supply stores. The dehydrator removes oils and moisture more effectively than rubbing alcohol alone.
Some people apply a thin layer of clear gel polish to their natural nails, cure it under a UV or LED lamp, then apply press-ons on top. The cured gel provides an optimal adhesion surface. This technique requires gel polish supplies but can make press-ons last up to three weeks.
For maximum security, try the “glue sandwich” technique: apply glue to your natural nail, let it dry until tacky, apply glue to the press-on, wait until tacky, then press together. This double-layer method creates exceptionally strong bonds.
Troubleshooting Common Issues
If your press-ons consistently pop off within a few days despite following all the tips, troubleshoot the specific problem. If they lift from the cuticle area first, you’re not pushing back your cuticles enough during prep or you’re applying the press-ons too far from your cuticle line. If they lift from the sides, you need to use press-ons that better match your nail width or file the press-ons to fit more precisely.
If press-ons pop off complete rather than lifting gradually, you’re using too much glue or not holding them down long enough during application. Too much glue never fully dries and creates a weak bond. If one or two nails always fail while others stay on, those fingers likely have more oil production or you’re using those fingers differently. Pay extra attention to prep on problem nails and consider applying a second coat of glue to them.
If press-ons crack or break off rather than lifting, you’re either choosing press-ons that are too long for your lifestyle or the quality of the press-ons is poor. Switch to shorter styles or higher-quality brands.
Setting Realistic Expectations
While these techniques can help press-ons last up to two weeks or longer, individual results vary based on your lifestyle, natural nail condition, and how precisely you follow the application process. Someone who works in an office and types gently will get longer wear than someone who works with their hands all day. That’s normal and expected.
Your first few attempts at extended-wear press-ons might not last as long as later attempts. There’s a learning curve to finding the right prep routine, application pressure, and daily care habits for your specific nails and lifestyle. Keep notes on what works and what doesn’t so you can refine your technique with each application.
Remember that press-ons are meant to be temporary, even when you extend their wear time. It’s normal and healthy to remove them after two weeks even if they could last longer. Your natural nails need breaks to breathe and recover between applications.
Final Thoughts
Making press-on nails last longer is absolutely achievable with the right preparation, application technique, and daily care. The extra few minutes spent on thorough nail prep and proper application can double or triple your wear time, making press-ons an even more economical and convenient nail option.
The key principles are simple: create the optimal surface for adhesion through thorough prep and dehydration, apply press-ons with proper technique and sufficient pressure, protect them from water and stress during the first 24 hours, and maintain them carefully with daily precautions and quick repairs as needed.
With practice and attention to these details, you’ll find your perfect routine for press-on nails that look salon-fresh and last as long as you need them. Your press-ons can take you through vacations, special events, and everyday life while keeping your natural nails protected and healthy underneath.
What’s your record for press-on wear time? Share your best tips and tricks in the comments below!