Must-Have Nail Tools for Home Manicures: The Complete List
Creating salon-quality manicures at home doesn’t require a massive collection of tools, but having the right essentials makes all the difference between frustrating attempts and professional-looking results. Walk into any beauty supply store and you’ll face thousands of nail tools, but most of them are specialized items you don’t actually need. This guide breaks down the genuine must-haves—the tools that will serve you well through countless manicures, the items professional nail technicians consider non-negotiable, and the investments worth making versus the things you can skip. Whether you’re just starting your home manicure journey or looking to upgrade your current collection, these are the tools that belong in every nail care kit.
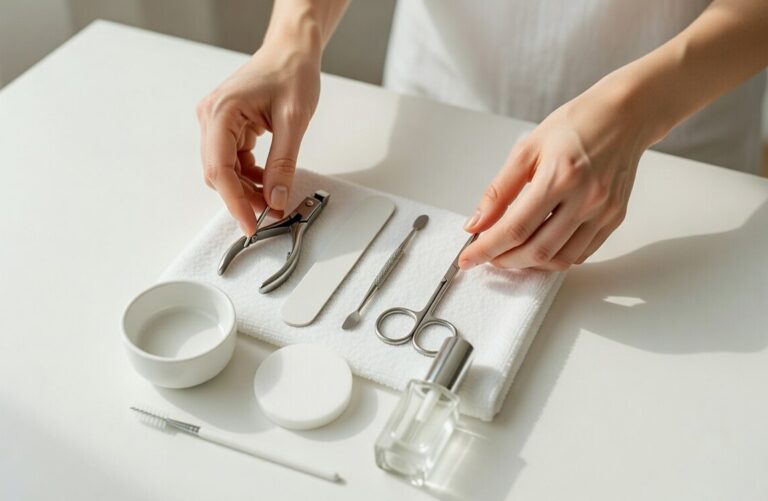
Nail Clippers: Your Foundation Tool
Quality nail clippers are the starting point for any manicure. They determine your nail’s length and set the stage for everything else. Don’t settle for the flimsy clippers from the checkout aisle at the drugstore—they bend, don’t cut cleanly, and often leave ragged edges that require extensive filing to fix.
Look for stainless steel clippers with sharp, precisely aligned blades. The best clippers cut through nails with one smooth squeeze rather than requiring you to crimp and work the nail. The lever should have a comfortable grip and provide adequate leverage without requiring excessive force. Clippers that are too small for your hands make the job harder than it needs to be.
You actually need two types of clippers if you do both fingernails and toenails. Fingernail clippers are smaller with a curved cutting edge that follows your nail’s natural curve. Toenail clippers are larger, stronger, and often have a straighter cutting edge to prevent ingrown toenails. Using fingernail clippers on thick toenails is a recipe for bent clippers and poorly cut nails.
Brands like Tweezerman, Seki Edge, and Harperton make excellent nail clippers that last for years. Expect to spend $10 to $20 for quality clippers—it sounds like a lot for such a simple tool, but good clippers remain sharp for years and make every manicure easier. Poor clippers need replacing annually and never work quite right.
Nail Files: The Shaping Essentials
Nail files are where many people go wrong by buying the cheapest option available. The grit, material, and quality of your nail file dramatically affect your results and nail health. You need at least two files with different grit levels—one for shaping and one for smoothing.
A medium-grit file (180-240 grit) is your workhorse for shaping nails and removing length. Glass or crystal nail files are superior to traditional emery boards because they seal the nail edge as you file, preventing splitting and peeling. The smooth surface files nails cleanly without catching or tearing. Glass files can be washed and sanitized, lasting indefinitely if not dropped.
A fine-grit file (240-400 grit) is for smoothing edges and perfecting your nail shape. This second pass with a finer file prevents the rough edges that snag on clothing or hair. Many people skip this step and wonder why their filed nails feel rough—the medium-grit file does the shaping, but the fine-grit file does the finishing.
Metal files should be avoided for natural nails. They’re too harsh and can cause splitting, though they work fine for artificial nails. Traditional emery boards work but wear out quickly and can’t be properly cleaned between uses. Invest in a good glass file—one $8-12 glass file will outlast dozens of disposable emery boards.
Always file in one direction rather than sawing back and forth. This technique prevents splitting and creates smoother edges. File at a slight angle from underneath the nail tip, moving from side to center. Never file wet nails—wait until they’re completely dry.
Cuticle Pusher: Non-Negotiable for Nail Health
A cuticle pusher is essential for creating clean, professional-looking manicures and maintaining healthy nails. Your cuticles protect the nail matrix where new nail growth forms, but excess cuticle on the nail plate prevents polish from adhering properly and makes manicures look messy.
The best cuticle pushers are made from stainless steel with a flat, slightly curved end. This design gently pushes back cuticles without gouging or damaging the nail plate or delicate cuticle tissue. Some pushers have dual ends—one for pushing cuticles and one pointed end for cleaning under nails. While convenient, the pointed end isn’t essential.
Wooden cuticle sticks (orange sticks) are an alternative to metal pushers. They’re gentler, making them ideal for people with sensitive cuticles or those prone to overdoing cuticle work. The downside is they can’t be properly sanitized and need frequent replacement. They work well for beginners who might be too aggressive with metal tools.
Use your cuticle pusher after a shower or after soaking your nails in warm water for a few minutes. The moisture softens cuticles, making them easy to push back gently. Work carefully around the entire nail, pushing cuticles back toward the base of your nail. Don’t press hard or scrape—gentle pressure is all you need.
Never cut your cuticles unless absolutely necessary for medical reasons. Cutting creates an entry point for infection and causes cuticles to grow back thicker and rougher. Proper pushing is sufficient for healthy, neat cuticles.
Nail Buffer: The Secret to Shine
A nail buffer is what takes your manicure from amateur to professional. Buffing smooths the nail surface, removes ridges, and creates a natural shine that makes even bare nails look polished. It’s especially important before applying polish because a smooth nail surface means better polish adhesion and a more even finish.
The best buffers are multi-sided blocks with different grits on each side. A typical four-sided buffer includes a coarse side for smoothing ridges, a medium side for further smoothing, a fine side for finishing, and a super-fine side for shine. This progression from coarse to fine creates the smoothest possible nail surface.
Use buffers gently and infrequently—over-buffing thins your nails and can cause damage. Once every two to three weeks is plenty for most people. Buff in one direction across the nail surface rather than scrubbing back and forth. Light pressure is sufficient—you’re smoothing the surface, not sanding down your nail.
For people with very ridged nails, a gentle buffing routine helps create a smoother canvas for polish. However, if your nails are thin or weak, skip the coarse buffing and stick to light smoothing with finer grits. Always follow buffing with moisturizer to prevent dryness.
Some people use buffers to create natural shine on bare nails as an alternative to polish. This works beautifully for a clean, professional look and is healthier than constantly wearing polish.
Cuticle Nipper: Use with Caution
Cuticle nippers are controversial—many nail professionals say you should never cut cuticles, while others believe strategic trimming has a place. The truth is somewhere in the middle. Nippers are useful for removing hangnails and dead skin around nails, but they’re not for routine cuticle cutting.
If you choose to own cuticle nippers, buy high-quality ones with sharp, precisely aligned blades. Tweezerman and Seki Edge make excellent nippers. The blades should meet perfectly without gaps and cut cleanly without pulling or tearing. Cheap nippers with dull or misaligned blades cause more problems than they solve.
Use nippers only for removing already-detached pieces of skin—hangnails and loose cuticles that are clearly separated from the nail. Never cut living, attached cuticle tissue. Hold the nippers parallel to your nail and make small, precise cuts. Don’t pull up on the skin while cutting, as this can remove more tissue than intended.
Many people do perfectly fine manicures without ever using nippers. If you’re prone to overdoing cuticle work or have a history of infections, skip the nippers entirely. A good cuticle pusher and cuticle remover product can handle most cuticle care needs safely.
Base Coat and Top Coat: The Polish Protectors
Base coat and top coat aren’t technically tools, but they’re so essential that no home manicure kit is complete without them. These products dramatically extend the life of your manicure and protect your natural nails.
Base coat creates a smooth, sticky surface that polish adheres to, preventing staining of your natural nails (especially from dark or highly pigmented polishes), filling in minor ridges for a smoother finish, and improving polish adhesion so it lasts longer without chipping. Without base coat, colored polish can penetrate and stain your nails, especially reds, blacks, and dark colors.
Good base coats contain ingredients that help bond polish to the nail. Look for base coats labeled as “ridge filling” if you have textured nails, or “strengthening” if you want added nail protection. Apply one thin coat and let it dry completely before applying color.
Top coat seals in your polish, creating a protective layer that prevents chipping and adds shine. It also speeds drying time by creating a hard surface that protects the colored polish underneath while it fully dries. Apply top coat to dry colored polish, making sure to cap the free edge (run the brush along the tip) to seal everything.
Quick-dry top coats are worth the investment. They contain ingredients that help polish layers dry faster and create a hard, chip-resistant surface. Seche Vite is the gold standard, though many brands make excellent quick-dry formulas. Expect to spend $8-12 for a quality top coat—it’s worth every penny.
Cotton and Remover: Cleanup Essentials
You need quality nail polish remover and the right applicators for clean, efficient manicures. The tools you use for polish application and removal significantly affect your results and how long the process takes.
For remover, choose acetone-free formulas for regular polish removal and general cleanup. Acetone-based remover is necessary for gel polish and acrylic removal, but it’s too harsh for regular use on natural nails. It dries out nails and surrounding skin excessively. Acetone-free removers take slightly longer to work but are much gentler.
Regular cotton balls or pads work for general polish removal, but lint-free cotton pads are superior for precision cleanup. They don’t leave behind cotton fibers that stick to wet polish. For removing polish from cuticles and skin, small precision pads or cotton swabs work best.
A precision cleanup brush—a small, flat brush dipped in remover—is a game-changer for fixing mistakes and cleaning up polish around your cuticles. Many nail artists consider this their secret weapon for professional-looking manicures. The brush picks up stray polish without affecting your main manicure.
Store your remover in a pump bottle or get a dip jar designed for nail polish removal. These make the process much neater than trying to pour remover onto cotton without spilling.
Hand Towels and Manicure Mat
Having designated towels and a workspace for manicures keeps your process organized and protects your furniture. A dark-colored hand towel (so polish stains don’t show) gives you a comfortable surface to rest your hands on and catches drips and spills.
A silicone manicure mat or padded workspace creates an even better setup. These mats have wells for holding bottles, built-in tool holders, and a cushioned surface for your hands. They’re easy to clean—any polish spills wipe right off silicone. While not strictly necessary, a dedicated manicure mat makes the process more comfortable and professional.
Some people use a simple placemat or piece of fabric designated for nail work. The key is having something that protects your table and contains the mess. Doing manicures directly on furniture risks stains from remover and polish that are difficult or impossible to remove.
Cuticle Oil or Cream: The Finishing Touch
Cuticle oil isn’t technically a tool, but it’s so important for nail health that it deserves mention. Well-moisturized cuticles look better, grow slower, and help prevent hangnails. Dry, raggedy cuticles ruin even the most perfect polish job.
Cuticle oil penetrates better than regular lotion and delivers moisture directly where it’s needed. Apply it to your cuticles and massage it in at least once daily, preferably twice. The best times are after washing hands (to replace lost moisture) and before bed (for overnight treatment).
Jojoba oil is the gold standard because its molecular structure closely resembles natural skin oils, allowing excellent absorption. Vitamin E oil is another excellent choice. Many commercial cuticle oils combine these with additional nourishing ingredients.
Cuticle oil in a pen applicator is most convenient for frequent use. Keep one at your desk, in your purse, and on your nightstand. The easier it is to apply, the more consistently you’ll use it. Consistent use makes a dramatic difference in cuticle appearance and nail health.
Optional but Useful: Nail Brush
A small nail brush for cleaning under nails and around cuticles isn’t essential but is incredibly useful. Use it with soap and water before starting your manicure to ensure nails are completely clean. Oils, dirt, or residue on nails prevent polish from adhering properly.
Look for a brush with soft to medium bristles—stiff bristles can be harsh on nail beds and cuticles. A simple wooden or plastic nail brush costs just a few dollars and lasts for years with proper care. Wash and dry it after each use to prevent bacterial growth.
What You DON’T Need
Many tools marketed for home manicures are unnecessary or even problematic. Electric nail files and drills are overkill for natural nails and can cause significant damage in untrained hands. Save these for professionals working on artificial nails.
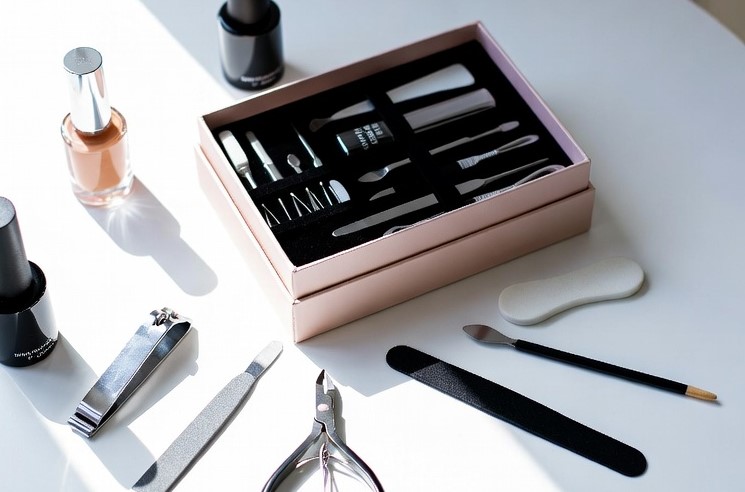
Cuticle scissors are redundant if you have good nippers, and they’re easy to misuse. Elaborate nail art kits with dozens of tools often include items you’ll never use. Cheap “complete” manicure sets that include everything usually contain low-quality versions of each tool—better to buy fewer items of higher quality.
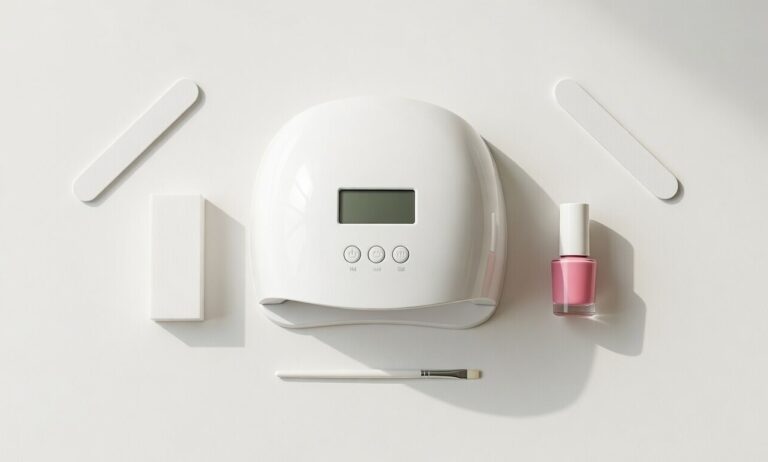
UV lamps are only necessary if you’re doing gel polish. For regular polish, they’re an expensive unnecessary addition. Similarly, acrylic supplies are only needed if you’re doing acrylic nails—don’t buy them “just in case.”
Quality Versus Quantity
When building your home manicure tool collection, prioritize quality over quantity. Five excellent tools will serve you better than twenty mediocre ones. Good tools make the process easier, produce better results, and last for years. Cheap tools frustrate you, break quickly, and often damage your nails.
Start with the absolute essentials: quality clippers, a glass nail file, a cuticle pusher, a buffer, base coat, and top coat. These six items enable you to do complete, professional-looking manicures. Add other tools as you identify specific needs rather than buying everything at once.
Buy the best quality you can afford for tools you’ll use regularly. Glass files, stainless steel cuticle pushers, and good nippers are worth the investment. Save money on items that wear out anyway, like cotton pads or wooden cuticle sticks.
Caring for Your Tools
Proper tool care extends their lifespan and ensures they work effectively. Clean your tools after every use with soap and water, drying them completely before storage. For metal tools, occasional sanitizing with rubbing alcohol prevents bacterial buildup.
Files should be replaced when they become worn and less effective. Glass files can be cleaned with soap and water or alcohol. Metal tools can be sharpened if they become dull—nail supply stores often offer sharpening services for clippers and nippers.
Store your tools in a clean, dry place. A small case or drawer organizer keeps everything together and protected. Avoid storing tools where they’ll be exposed to moisture, which can cause rust or deterioration.
Building Your Kit Gradually
You don’t need to buy everything at once. Start with the core essentials and add tools as you develop your skills and identify needs. Your first few manicures will reveal what’s missing from your collection. Maybe you need a finer file, or you wish you had better nippers, or you want cuticle oil. Let experience guide your purchases.
Many people find that starting with a quality basic kit and then upgrading individual tools as needed works well. The initial kit gets you started, and strategic replacements with better versions improve your results over time.
As you progress, you might want to add specialized tools for specific techniques—dotting tools for nail art, striping brushes for designs, or stamping equipment for patterns. But these are additions for when you’re ready to expand beyond basic manicures.
The Investment Pays Off
A complete set of quality home manicure tools costs $50 to $100 initially. This might seem expensive, but consider that a single salon manicure costs $25 to $50. Your tool investment pays for itself after just two or three home manicures. Over a year of weekly manicures, you’ll save hundreds or even thousands of dollars.
More importantly, having the right tools means you can do your nails whenever you want, on your schedule, in your home. No appointments, no travel time, no settling for whatever the salon has available. The convenience and flexibility alone make home manicure tools a worthwhile investment.
Your Complete Shopping List
To summarize, here’s what you need for complete home manicures:
Essential Core Tools:
- Quality nail clippers (fingernail and toenail)
- Glass nail file (180-240 grit for shaping)
- Fine-grit nail file (240+ grit for smoothing)
- Stainless steel cuticle pusher
- Four-sided nail buffer
- Base coat
- Top coat
- Acetone-free nail polish remover
- Lint-free cotton pads
- Cuticle oil
Useful Additions:
- Cuticle nippers (use carefully)
- Nail brush
- Precision cleanup brush
- Manicure towel or mat
- Small bowl for soaking
Nice to Have:
- Quick-dry drops or spray
- Nail strengthener
- Hand cream
- Orange sticks
This collection covers everything you need for professional-quality manicures at home. Each tool has a specific purpose, and together they create a complete system for nail care and polish application. Start with the essentials, maintain your tools properly, and add specialty items as your skills develop. Before long, you’ll wonder why you ever paid for salon manicures when you can achieve the same results at home with the right tools and a little practice.
What nail tools have you found most essential for home manicures? Are there any game-changers we missed? Share your favorites in the comments!