How to Make Press-On Nails Last Longer: 7 Amazing Tips
We’ve all been there. You spend twenty minutes carefully applying a fresh set of press-ons; they look absolutely gorgeous — and then two days later, one pops off while you’re just washing your hands. Frustrating doesn’t even cover it.

Here’s the truth: it’s almost never about the nails themselves. Knowing how to make press-on nails last longer really comes down to a handful of small habits that most people skip without realising how much difference they make.
Get these right, and a well-applied set can genuinely last you one to two weeks. Yes, really.
Why Your Press-Ons Keep Popping Off
Before we get into the tips, it’s worth understanding what’s actually going wrong when press-ons fall off early.
Nine times out of ten, it’s oil. Your nail plate naturally produces oils throughout the day, and if there’s even a trace of that left on the surface when you apply your press-ons, the adhesive just can’t do its job properly. Add a bit of hand cream, some leftover polish residue, or even a drop of water – and you’re essentially sticking the nail to a slippery surface.
That’s why how to make press-on nails last longer is really a conversation about prep first and everything else second. Once you fix the prep, everything else falls into place.
What to Have Ready Before You Start
You don’t need a huge kit — but having the right things to hand makes a real difference. Before you sit down to apply your set, grab these:
- Your press-on nail set
- Isopropyl alcohol (70%+) or a nail prep dehydrator
- A soft nail buffer block
- A cuticle pusher
- A good-quality nail glue (don’t rely solely on what’s included in the kit)
- Clear top coat
- Rubber gloves for later
Having these essential items lined up makes the application smooth and stress-free. Understanding how to make press-on nails last longer starts right here, long before a single tip touches your hand.
Tip 1: Degrease Your Nails Like You Mean It
This is the big one. If you only take one tip away from this entire article, make it this.
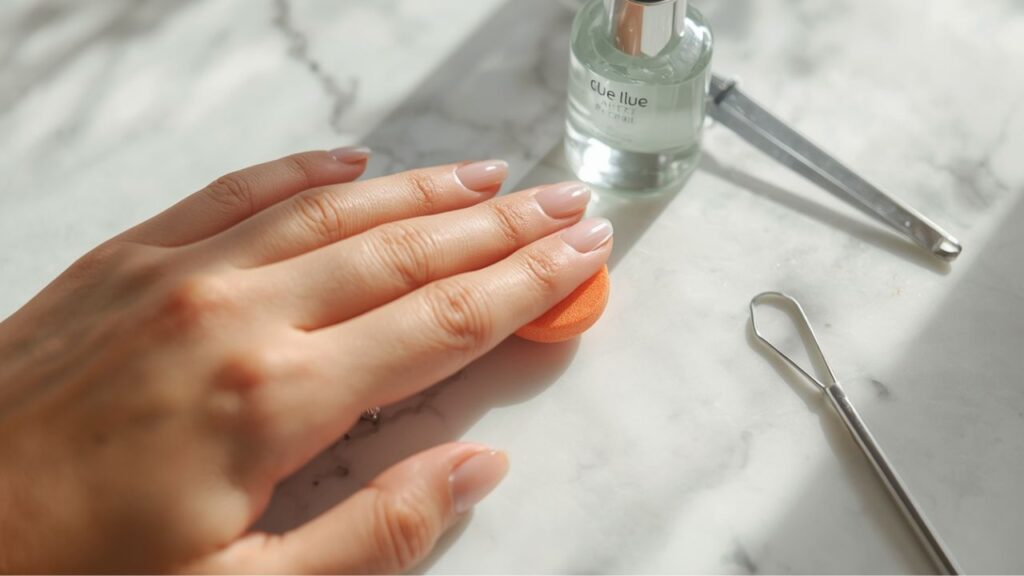
Start by removing any existing polish with a non-acetone remover, then wash your hands with soap and warm water. Once they’re dry, use a cuticle pusher to gently ease back your cuticles — this gives the press-on a bigger, cleaner surface area to grip. Then lightly buff the nail plate with your buffer to knock off the natural shine and create just a tiny bit of texture.
Finish by wiping each nail firmly with an alcohol-soaked pad and letting them air dry completely. Don’t blow on them; don’t touch them. Just wait. That alcohol step removes residual oil that soap and water alone won’t catch. Taking these simple steps is the ultimate secret on how to make press-on nails last longer without any issues.
It feels like a lot of steps for prep, but it takes about five minutes, and it’s honestly the number one reason people finally crack how to make press-on nails last longer after years of early pop-offs.
Tip 2: Size Matters More Than You Think
A press-on that doesn’t fit your nail bed properly will always lift early. It doesn’t matter how good your glue is — if the nail is slightly too wide or too narrow, the edges won’t bond flush, and moisture will creep in underneath within days.
Before you open the glue, hold each press-on over its corresponding finger and check the fit. It should sit edge-to-edge across the nail plate without overhanging the sides. If the closest option is slightly too big, file down the edges until it fits properly. It takes an extra two minutes, but it’s the difference between your press-on nails lasting longer than expected and losing half the set by day three.
Taking an extra two minutes to custom-file the edges ensures a flush, seamless seal. If you want to know how to make press-on nails last longer, never skip custom fitting your set.
Tip 3: Ditch the Tabs; Use Real Nail Glue
Adhesive tabs have their place — they’re brilliant if you’re wearing a set for one evening and want easy removal. But if you want your set to genuinely last, you need nail glue.
Apply a thin layer to both the back of the press-on and your natural nail. ‘Thin’ is the key word here — too much glue creates air pockets that work against you and cause lifting at the edges. A thin, even coat on both surfaces bonds far more securely than a thick dollop on one side.
According to Healthline’s guide to nail health, protecting the nail surface and choosing the right bonding product for your lifestyle significantly affects how long any nail system holds. Getting this step right is a quiet but critical part of how to make press-on nails last longer in real daily life.
Tip 4: The 45-Degree Trick That Changes Everything
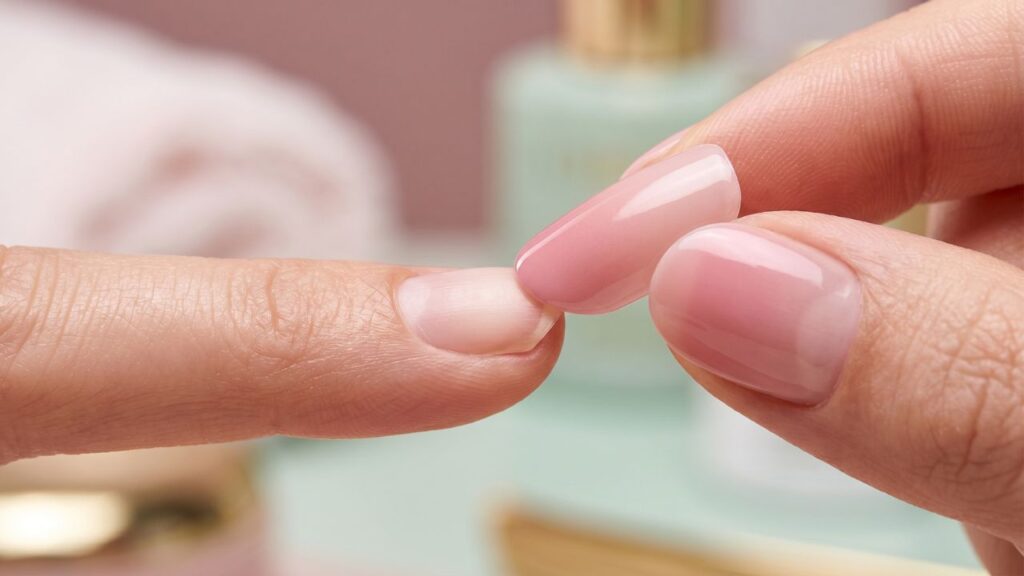
Most people just press the nail straight down – and that’s where air bubbles sneak in. Instead, angle the press-on at roughly 45 degrees, starting from the cuticle end, and roll it gently down toward the tip. This technique pushes air outward rather than trapping it underneath.
Once it’s in position, press firmly in the centre and hold. Thirty seconds is the minimum. A full minute if you can manage it. Then pinch the side edges inward to make sure the full surface has made contact. It feels like a lot of effort for one nail, but do this across all ten, and you’ll immediately notice how much more secure the set feels. If you are wondering how to make press-on nails last longer, always remember that application technique plays a huge role.
This single technique is genuinely one of the most underrated answers to how to make press-on nails last longer, and most people have never heard of it.
Tip 5: Seal Those Edges Every Few Days
Once everything is applied and the glue has set, take your clear top coat and swipe it across each nail — paying particular attention to the very edge where the press-on meets your natural nail. That border is where lifting almost always starts.
Reapply your top coat every two to three days to keep the seal strong. It takes two minutes, adds a nice fresh shine, and keeps daily grime from working its way underneath the nail edge. If you feel any slight lift starting, catch it early with a tiny drop of glue before it gets worse.
Tip 6: Stay Away From Water for the First Hour
This one sounds simple, but people forget it every time. Nail glue takes a full hour to properly cure — and water weakens the bond while it’s still setting. No handwashing, no dishes, no shower.
After that first hour, make rubber gloves your best friend whenever you’re at the sink. Hot water, dish soap, and cleaning products all shorten the lifespan of your adhesive over time. It doesn’t mean you can’t get your hands wet — it just means protecting them when you do.
Protecting your hands from hot steam and water during that initial cure time makes a massive difference. Following this rule is a simple yet powerful way on ”how to make press-on nails last longer without early edge lifting.
Tip 7: Treat Your Nails Like They Cost £80
This sounds dramatic, but hear me out. If you’d just paid for a professional gel set, you wouldn’t be using your nails to prise open a tin or scrape a sticker off a jar. Apply that same logic to your press-ons, and they’ll reward you by sticking around much longer.
Don’t use your nails as tools. When you type, use the pads of your fingers rather than tapping with the tips. Avoid picking at the edges out of habit — that’s usually how a pop-off starts. According to WebMD’s nail care guide, consistent protective habits are just as important as any product you apply.
For more in-depth advice on keeping your natural nails healthy between press-on sets, have a read through our complete guide to healthy nail growth — it covers everything you need to know about nail bed care, nutrition, and at-home nail health. By avoiding harsh handling, you will easily master how to make press-on nails last longer every single time.
Final Thoughts
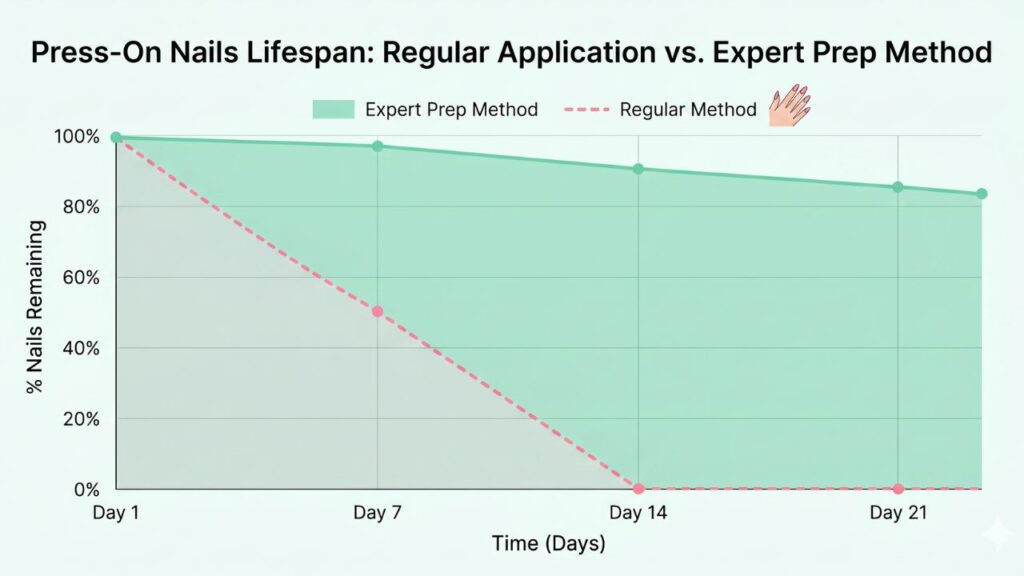
Press-on nails really can last — properly applied, a good set can give you a full two weeks of wear that genuinely looks salon-quality. The secret isn’t some specialist product or complicated technique. It’s just doing the boring-but-important bits properly: clean, oil-free prep, the right glue, a good fit, and a bit of daily care.
Now you know exactly how to make press-on nails last longer; give these tips a try with your next set and see how different the results are. Because your press-on nails last longer when they’re applied with intention — not just stuck on and hoped for.