Essential Manicure Tools for Beginners: 2026 Guide
Starting your home manicure journey can feel overwhelming when faced with countless tools and products, each claiming to be essential. The truth is, you don’t need dozens of specialized tools to give yourself professional-looking manicures at home. A small collection of quality basics will serve you far better than a drawer full of cheap gadgets you never use. This guide breaks down the truly essential tools every beginner needs, what to look for when buying them, how to use them properly, and which tools you can skip until you’re ready to level up. Whether you’re looking to save money on salon visits or simply enjoy the satisfaction of doing your own nails, these are the tools that will get you there.
The Core Essentials: What You Actually Need
Before diving into specific tools, let’s establish what “essential” means. Essential tools are those you’ll use for every single manicure, that can’t easily be substituted with something else, that work for basic nail care regardless of your style preferences, and that provide good value for the investment.
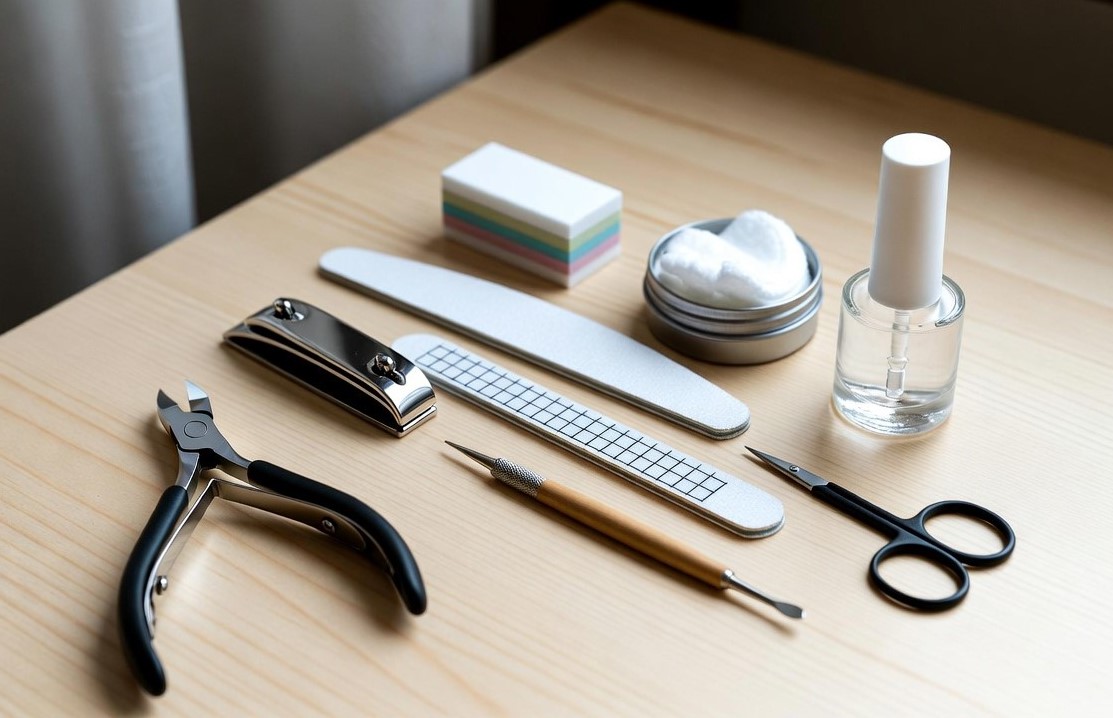
Your essential toolkit should include nail clippers, at least two nail files (different grits), a cuticle pusher, a buffer, nail scissors or cuticle nippers (optional but helpful), base coat and top coat, nail polish remover, cotton pads or balls, and cuticle oil or hand cream.
That’s it. Ten items or fewer to start. Everything else—dotting tools, stamping plates, nail art brushes, electric files—can wait until you’ve mastered the basics and know what you actually want to pursue.
Nail Clippers: Your First Investment
Quality nail clippers are the foundation of good nail care. They determine your starting point for every manicure. Cheap clippers bend, don’t cut cleanly, and leave ragged edges that require extensive filing to fix.
Look for stainless steel clippers with sharp, precisely aligned blades. The cutting edges should meet perfectly without gaps. The lever should provide adequate leverage without requiring excessive force. When you squeeze the clipper, it should cut smoothly through the nail in one motion, not require crimping or multiple squeezes.
You technically need two types of clippers if you do both fingernails and toenails. Fingernail clippers are smaller with curved cutting edges that follow your nail’s natural curve. Toenail clippers are larger, stronger, and often have straighter edges to prevent ingrown toenails. However, if you’re just starting and need to choose one, get fingernail clippers—they work adequately for toenails in a pinch.
Quality brands to consider include Tweezerman, Seki Edge, and Harperton. These professional-grade options last for years and make every manicure easier. Budget-friendly alternatives from Revlon or Sally Hansen work adequately if you’re testing the waters before investing in premium tools.
How to use them properly: Clip nails when completely dry, never wet (wet nails are more likely to tear). Cut straight across for toenails to prevent ingrowns, following the natural curve for fingernails. Don’t cut too short—leave a small margin of white free edge. Make several small clips rather than trying to remove large sections at once.
After clipping, you’ll always need to file the edges smooth. Clippers leave slightly rough edges even when sharp. This is normal and expected.
Nail Files: The Most Important Purchase
This is where you should spend money and attention. Your nail file affects nail health more than almost any other tool. The wrong file damages nails, while the right file shapes them perfectly without causing splits or peeling.
You need at least two files: a medium-grit file (180-240 grit) for shaping and removing length, and a fine-grit file (240-400 grit) for smoothing edges and finishing.
Glass or crystal nail files are the best investment for beginners. They seal the nail edge as you file, preventing splitting and peeling. The ultra-smooth surface files cleanly without catching or tearing. They can be washed and sanitized, lasting indefinitely if not dropped. One good glass file replaces hundreds of disposable emery boards over time.
Traditional emery boards work but have significant drawbacks. They wear out quickly, becoming less effective after a few uses. You can’t properly clean them between uses. They’re more likely to cause nail damage than glass files. However, they’re inexpensive and work fine if you’re on a tight budget.
Metal files should be avoided for natural nails. They’re too harsh and cause splitting, though they work fine for artificial nails. If you have metal files, save them for shaping press-ons or acrylics, not your natural nails.
How to file properly: File in one direction only, not back and forth. Hold the file at a slight angle under the nail tip, moving from the side toward the center. Never file the nail surface unless you’re using a specialized buffer. File dry nails only—wet nails are vulnerable and filing them causes damage.
Popular glass file brands include Mont Bleu, Revlon, and various options from beauty supply stores. They all work similarly—the main differences are handle design and size.
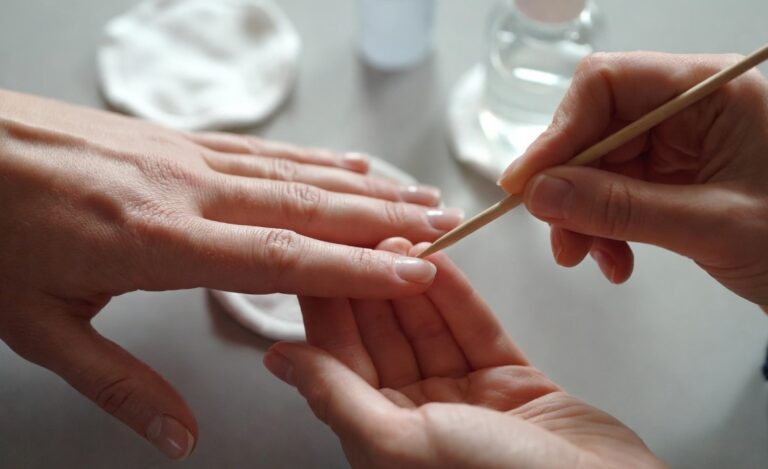
Cuticle Pusher: Essential for Professional Results
A cuticle pusher is non-negotiable for neat, professional-looking manicures. Your cuticles naturally grow over the nail plate, and pushing them back creates a clean canvas for polish and prevents premature chipping.
The best cuticle pushers are stainless steel with a flat, slightly curved end that conforms to the nail’s natural curve. This design allows gentle pushing without gouging the nail plate or damaging delicate cuticle tissue. Double-ended pushers often have a pointed end for cleaning under nails, which is convenient but not essential.
Wooden cuticle sticks (orange sticks) are an alternative to metal pushers. They’re gentler, making them ideal for beginners who might be too aggressive initially. The downside is they can’t be sanitized properly and need frequent replacement. They work well while you’re learning proper pressure and technique.
Quality metal pushers are available from brands like Tweezerman, Revlon, or Sally Hansen. Orange sticks are much more economical and sold in multi-packs.
How to use them: Push cuticles after a shower when they’re soft, or soak nails in warm water for 5 minutes first. Hold the pusher at a gentle angle and push cuticles back toward the base of your nail using light pressure. Work your way around the entire nail. Don’t scrape or press hard—gentle pushing is all that’s needed.
Never cut cuticles unless absolutely necessary. Cutting creates entry points for infection and causes cuticles to grow back thicker. Proper pushing is sufficient for healthy, neat cuticles.
Nail Buffer: The Shine Secret
A buffer creates smooth nail surfaces and natural shine. Buffing removes ridges, smooths rough spots, and creates an even surface that helps polish adhere better and last longer.
The best buffers for beginners are multi-sided blocks with different grits on each side. A typical four-sided buffer includes a coarse side for ridge removal, medium side for smoothing, fine side for further refinement, and ultra-fine side for creating shine.
Use buffers gently and infrequently. Over-buffing thins your nails and causes weakness. Once every 2-3 weeks is plenty for most people. Buff in one direction across the nail surface using light pressure. You’re smoothing the surface, not aggressively sanding it down.
Quality buffers are affordable and last for months. Popular options include Sally Hansen buffers, Revlon buffers, and various beauty supply store brands. They’re all similar in function—choose based on feel and quality.
Some people use buffers to create natural shine on bare nails instead of wearing polish. This works beautifully for a clean, professional look and is healthier than constant polish wear.
Cuticle Nippers: Optional but Helpful
Cuticle nippers are controversial. Many professionals say you should never cut cuticles, while others believe strategic trimming has value. The truth is nippers are useful for removing hangnails and dead skin, but they’re not for routine cuticle cutting.
If you choose to own nippers, buy quality ones with sharp, precisely aligned blades. Tweezerman and Seki Edge make excellent nippers that are worth the investment. The blades should meet perfectly and cut cleanly without pulling or tearing. Cheap nippers with dull or misaligned blades cause more problems than they solve.
Use nippers only for removing already-detached pieces of skin—hangnails and loose cuticles that are clearly separated. Never cut living, attached cuticle tissue. Hold nippers parallel to your nail and make small, precise cuts. Don’t pull up on skin while cutting.
Many beginners do perfectly fine without nippers. If you’re prone to overdoing cuticle work or worry you’ll cut too much, skip nippers entirely. A good cuticle pusher and cuticle remover gel can handle most needs safely.
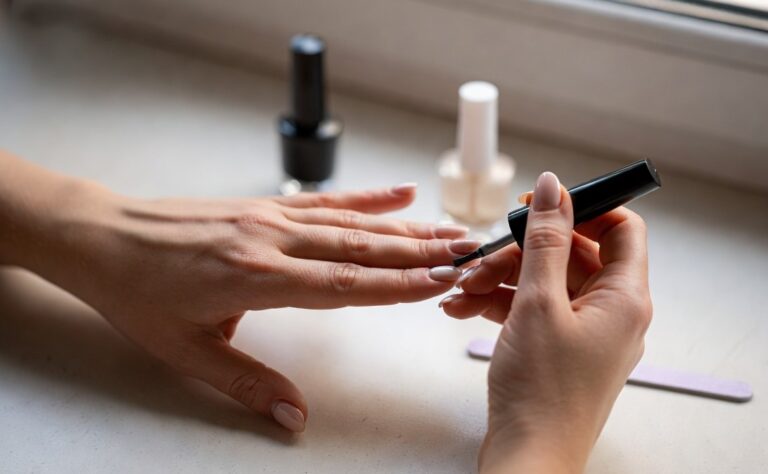
Base Coat and Top Coat: The Polish Protectors
Base coat and top coat aren’t technically tools, but they’re so essential they deserve detailed coverage. These products protect your nails and extend the life of your manicure dramatically.
Base coat creates a smooth surface for polish application, prevents staining from dark or pigmented polishes, fills minor ridges for an even finish, and improves polish adhesion for longer wear. Without base coat, colored polish can stain your nails, especially reds, blacks, and dark colors.
Look for base coats labeled “ridge filling” if you have textured nails, or “strengthening” if you want added nail protection. Popular options include OPI Natural Nail Base Coat, Essie First Base, and Sally Hansen Hard as Nails.
Top coat seals polish, preventing chipping and adding shine. It speeds drying by creating a hard protective surface. Quick-dry top coats are worth the investment—they contain ingredients that help all polish layers dry faster.
Seche Vite is the gold standard quick-dry top coat. Essie Gel Couture Top Coat and Sally Hansen Insta-Dri are also excellent choices. Apply top coat when colored polish is dry to the touch, making sure to cap the free edge by running the brush along the nail tip.
Polish Remover and Application Supplies
You need effective polish removal supplies. Choose acetone-free remover for regular polish removal and general cleanup. Acetone is necessary only for gel polish removal and is too harsh for frequent use on natural nails.
Cotton pads work better than cotton balls for polish removal because they’re less likely to leave lint. Lint-free pads are even better for precision cleanup. Buy a large pack—you’ll use them constantly.
A precision cleanup brush is a game-changer. This small, flat brush dipped in remover fixes mistakes and cleans polish from cuticles with surgical precision. Many nail artists consider this their secret weapon for professional-looking manicures. You can buy one specifically designed for nails or use a small art brush.
Store remover in a pump bottle or get a dip jar designed for nail polish removal. These make the process neater than pouring remover onto cotton.
Cuticle Oil: Your Nail Health Foundation
Cuticle oil maintains nail health and prevents problems before they start. Well-moisturized cuticles and nails are flexible, strong, and grow better. Dry nails are brittle and prone to breaking.
Pure oils work excellently: jojoba oil (the best for absorption), sweet almond oil (affordable and effective), vitamin E oil (healing properties), or argan oil (luxurious and nourishing). Commercial cuticle oil blends combine multiple oils for comprehensive benefits.
Pen applicators are most convenient for frequent use. Keep one at your desk, bedside, and in your purse. The easier application is, the more consistently you’ll use it—and consistency is what produces results.
Apply cuticle oil at least twice daily, massaging it into nails and cuticles for 30 seconds per hand. This is the single most important daily habit for healthy nails.
What You Don’t Need (Yet)
As a beginner, skip these items until you’ve mastered basics and know you want them:
Electric nail files and drills are overkill for natural nails and can cause damage in untrained hands. Elaborate nail art kits with dozens of tools include many items you’ll never use. UV/LED lamps are only necessary if you’re doing gel polish. Acrylic supplies are only needed for acrylic nails—don’t buy “just in case.”
Dotting tools, striping brushes, stamping plates, and other nail art supplies can wait until you’re ready to explore designs. Master basic manicures first, then add specialty tools as specific interests develop.
Building Your Kit Gradually
You don’t need everything immediately. Start with the absolute essentials: nail clippers, one good glass file, a cuticle pusher, a buffer, and base/top coat. This minimal kit enables complete basic manicures. Add items as you identify specific needs.
Many people find that buying a basic starter kit, then upgrading individual tools to better quality versions as needed, works well. The initial kit gets you started, and strategic replacements improve results over time.
Storage and Organization
Proper storage protects your investment and keeps tools clean and accessible. Store tools in a clean, dry place away from humidity that can cause rust. A small case or drawer organizer keeps everything together. Zippered cosmetic bags work well for portable storage.
Clean tools after each use with soap and water, dry completely, and sanitize metal tools weekly with rubbing alcohol. This prevents bacterial buildup and extends tool life.
Learning to Use Your Tools
Having tools is just the start—learning proper technique takes practice. Watch tutorial videos to see correct tool usage and technique. Start with basic manicures before attempting complex nail art. Practice on one hand before doing both. Be patient with yourself—everyone’s first manicures are imperfect.
Your skills will improve faster than you expect. By your third or fourth manicure, you’ll be significantly better than your first attempt. By ten manicures, you’ll wonder why you ever paid for salon services.
Common Beginner Mistakes
Avoid these pitfalls that trip up most beginners:
Using dull or cheap tools makes everything harder. Invest in quality basics. Over-buffing thins nails and causes weakness—gentle pressure and infrequent buffing prevent this. Cutting cuticles too aggressively creates problems. Push, don’t cut, until you’re experienced.
Filing wet nails damages them. Always file completely dry nails. Using too much polish creates thick, uneven layers that chip quickly. Multiple thin coats work better than fewer thick ones.
Skipping base and top coat reduces manicure longevity dramatically. Don’t skip these crucial steps.
Upgrading Your Tools Over Time
As you gain experience, certain upgrades enhance your manicures. Better clippers that feel more comfortable and cut more cleanly are worth upgrading. Additional file grits for different purposes give you more options. A variety of cuticle oils to rotate through prevents boredom with your routine.
Specialty tools for techniques you’ve developed interest in—like gel lamp if you want to try gel polish—make sense once you’ve established that this is a lasting hobby, not a passing interest.
The Bottom Line
Essential manicure tools for beginners are surprisingly minimal. Quality clippers, a good glass file, a cuticle pusher, a buffer, base and top coat, and cuticle oil are all you truly need. These tools enable professional-quality manicures at home.
Focus on quality over quantity. Five excellent tools serve you better than twenty mediocre ones. Invest in the best you can find for items you’ll use constantly, and choose economical options for disposables or items that wear out anyway.
Your initial investment in quality tools pays for itself quickly compared to regular salon visits, then provides years of reliable service. The satisfaction of doing your own nails, on your schedule, with results you’re proud of, is invaluable.
Start with the basics, master proper technique, and add specialty tools as your interests develop. Before long, you’ll have a curated collection of tools perfectly suited to your needs and preferences, and the skills to use them like a professional.
What tools do you consider essential for home manicures? Are there any items you couldn’t live without or any you wish you’d bought sooner? Share your recommendations in the comments to help other beginners!